by Scott Martin Photography | Oct 5, 2013 | Blog, Cityscapes, Educational, Landscapes, Travel
The Vatican Museums are a collection of many museums located within the walls of Vatican City. The first museum was initiated by Pope Julius II in 1503 and generally speaking the popes were the first European sovereigns who opened their palaces to the public introducing the public to their extensive art collections and with that a better understanding of art history and culture. In 2006 the Vatican Museums celebrated their 500th birthday and now there are approximately two dozen museums averaging more than 5,000,000 visitors every year.
Admission to the museums, which includes the Sistine Chapel, is €16 however make sure you purchase your tickets online before heading to the Vatican which allows you to completely skip the que and head directly into the museums. This will save you up to three hours in line if you are in Rome at the height of the tourist season.
Deb & I took hundreds of pics as we wandered through as many sections of the museums as we could fit in and it was clearly a case of sensory and information overload as we tried to absorb and remember as much as we possibly could.
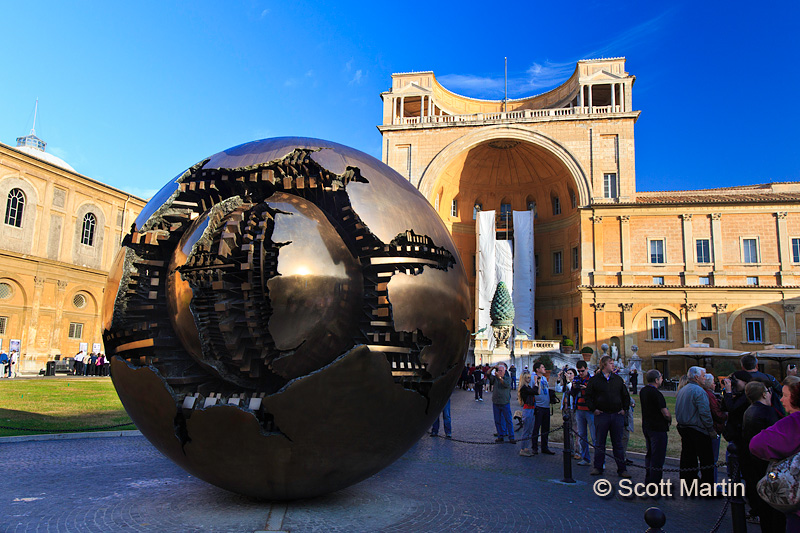
Although the art contained in the Vatican Museums is typically ancient, the central Courtyard of the Pinecone contains a large sculpture that was very cool however seemingly out of place with surrounding artefacts.

Named ‘Sfera con Sfera’ or Sphere within a Sphere, it is just over 13 feet in diameter and although it must weigh many tons it easily spins around its axis with a little elbow grease. The Pinecone (Pigna) in the back ground from which the courtyard gets its name is a first century Roman bronze that was originally the working centrepiece of a fountain located near the Pantheon. It is about 13′ high and was moved during the middle ages to the courtyard of the original St. Peter’s Basilica and then to its present location in 1608.
Although there are many ‘typical’ museum displays, the Vatican Museums catalogue and store thousands of artefacts which line the corridors of the many buildings that comprise the museums.
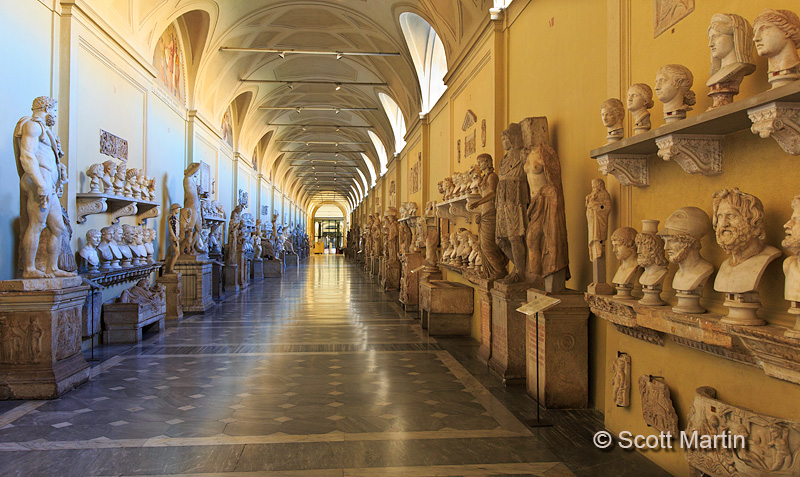
Located in the Round Room of the museum are two objects that were quite interesting, a gilded bronze statue of Hercules and one of the bathtubs from Nero’s palace.
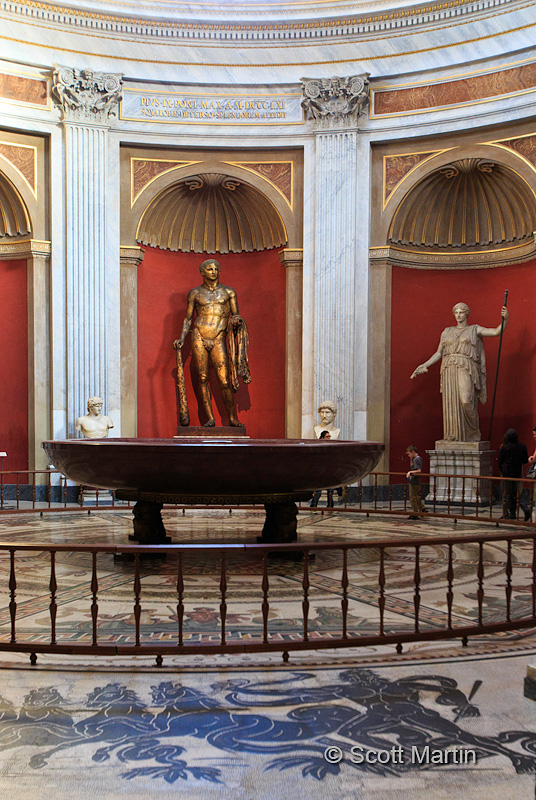
Nero was the Emperor of Rome from 54-68 AD. An evil tyrant who was a fierce opponent of Christianity, being responsible for the execution of thousands of Christians. His life was characterized by hedonistic excess that was epitomized by his royal palace, the Domus Aurea (Golden House) which he built after the great fire of Rome in 64 AD. In fact, it has been alleged that Nero started the fire in order to make room for his palace, hence the phrase “Nero fiddled while Rome burned”. Nero had his own mother executed as well as one of his wives and his step-brother was poisoned apparently at Nero’s direction. In 68 AD after being ousted from power, he committed suicide, the only emperor to do so.
At some level Nero’s life is represented by the bathtub pictured above. It was constructed of the rarest marble in the world, called Porphyry for its deep purple colour. Reserved for royals and only found on an Egyptian mountaintop some 800 km from Rome where it was mined by convicts and imprisoned Jews and Christians. Nero’s bathtub is almost twenty feet in diameter and stand almost six feet high on its ornate legs (note the people in the picture above for a reference point). The tub is valued at $100,000,000.00.
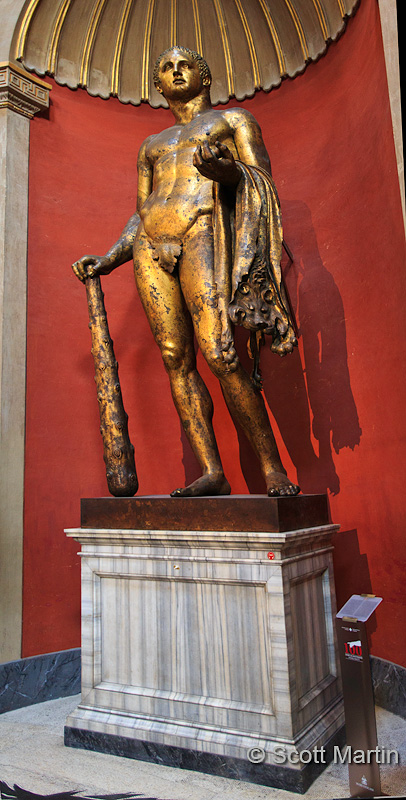
So while Nero rejected God and executed the Christians of the first century church, who did he worship? Probably the mythological Greek gods, like Hercules, who is seen above overlooking Nero’s bathtub. The gilded bronze larger than life-size statue of Hercules that stands in the Vatican is thought to date back to the first century. It was found in 1864 neatly buried under travertine stones in the area that was once Pompey’s Theatre. The stones protecting the statue were engraved with the letters FCS which means that the statue was struck by lightning and according to Roman tradition granted a ritual burial together with the remains of a lamb.
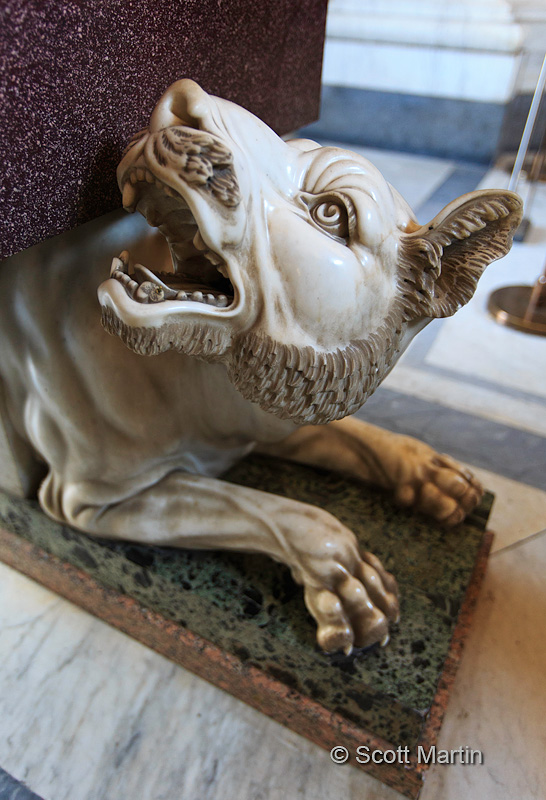
The detail contained in artworks of the past are impressive as shown in the white marble animal below that functions to support the marble base that rests on its back.
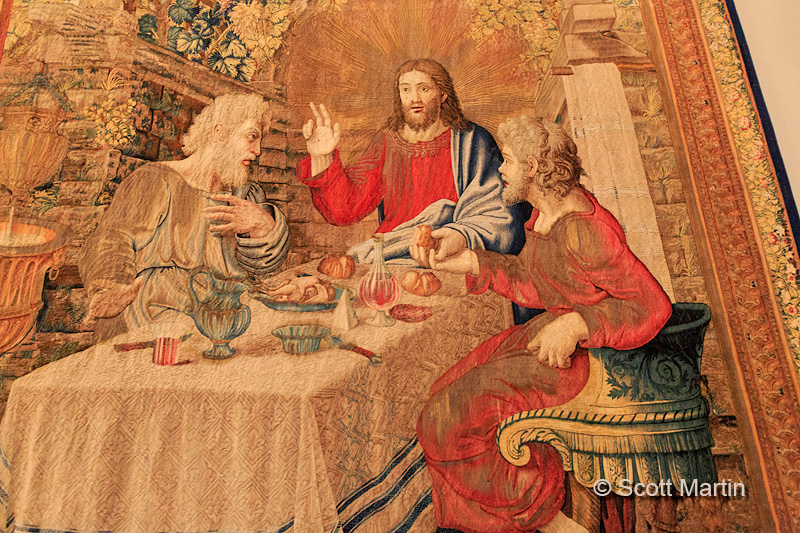
The Gallery of Tapestries contains a number of Flemish tapestries that were made in Brussels in approximately 1523 and first displayed at the Vatican in the Sistine Chapel in 1531. The tapestries were given their own gallery in 1838 and remain there today. The exquisite detail and colour in the stitching of the tapestries is incredible, especially when you consider they are almost 500 years old. You forget they are essentially carpets so in the image below I’ve purposely kept the edge visible on the right to remind you. The tapestry is titled Supper at Emmaus showing the risen Lord eating with the men He joined while walking to Emmaus (Luke 24:13-35).
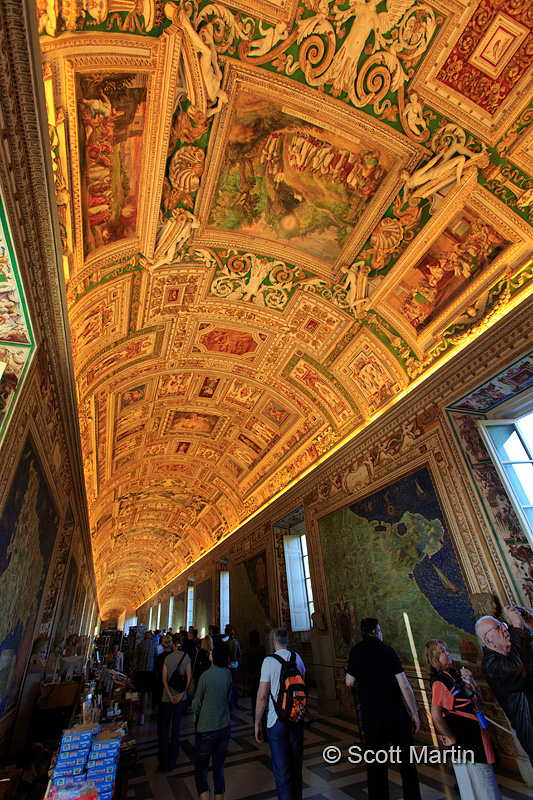
Probably one of the most popular galleries in the Vatican is the 120m hallway leading towards the Sistine Chapel known as the Gallery of Maps. Commissioned in 1580 by Pope Gregory XIII it contains 40 large topographical maps of Italy. The gallery took three years to build and has a ceiling that is as impressive as the maps that adorn its walls.
At the end of the Gallery of Maps you go down a small narrow flight of steps, pass through a rather nondescript doorway and find yourself in one of the most visually stunning rooms in the world, the Sistine Chapel; the Pope’s private chapel and home to Michelangelo’s most famous works that adorn the walls and ceiling. The Sistine Chapel is perhaps the world’s most well-known chapel and one of its oldest with construction through 1473-1481. It is part of the Papal Palace and is interesting in that it lacks a grand entrance typical of churches and there are no entrances or exits directly to the outside. The Sistine Chapel measures 134 x 44 feet, patterned after the size of Solomon’s Temple. The vaulted ceiling rises 68′ above the floor.
When entering the chapel for the first time, it was the vibrancy of the colours that surprised me the most. I was expecting subdued colours, especially on paintings that are 500 years old, however they are actually bright and vibrant.
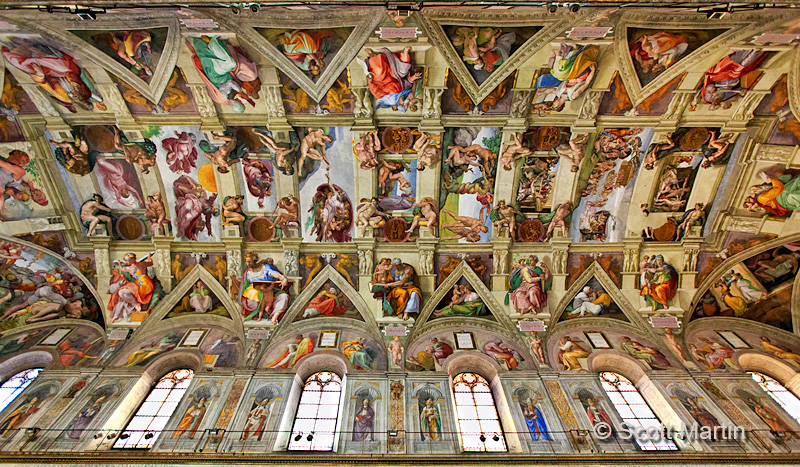
Michelangelo was commissioned by Pope Julius II in 1508 to paint the ceiling, which he completed between 1508 and 1512. In total the frescos painted on the ceiling covered over 5,000 square feet and contained more than three hundred figures.
Michelangelo painted “The Last Judgement” on the wall behind the altar from 1535-1541.
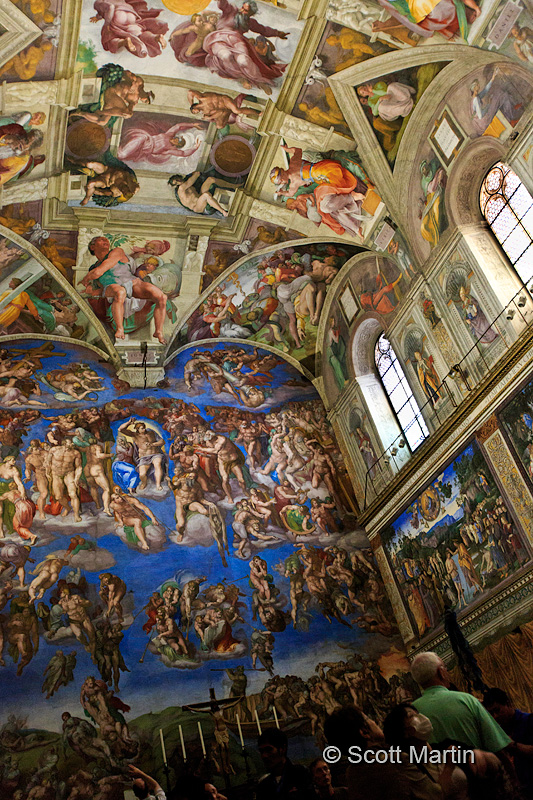
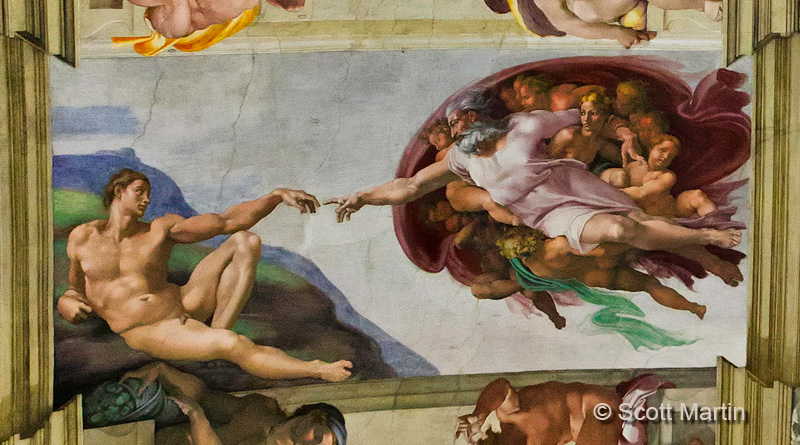
There is some debate whether Michelangelo painted the ceiling lying down or standing up. Either way it is generally agreed that scaffolding was built at a level above the top of the windows which would by design block the viewing of the ceiling from the floor beneath. This means that the figures on ceiling were painted without the benefit of having the proper proportional perspective that would be available from the floor. That Michelangelo could paint such large figures at such close range and maintain proper proportional relationships is truly remarkable as demonstrated in “The Creation of Adam”, perhaps the most famous of the ceiling panels.
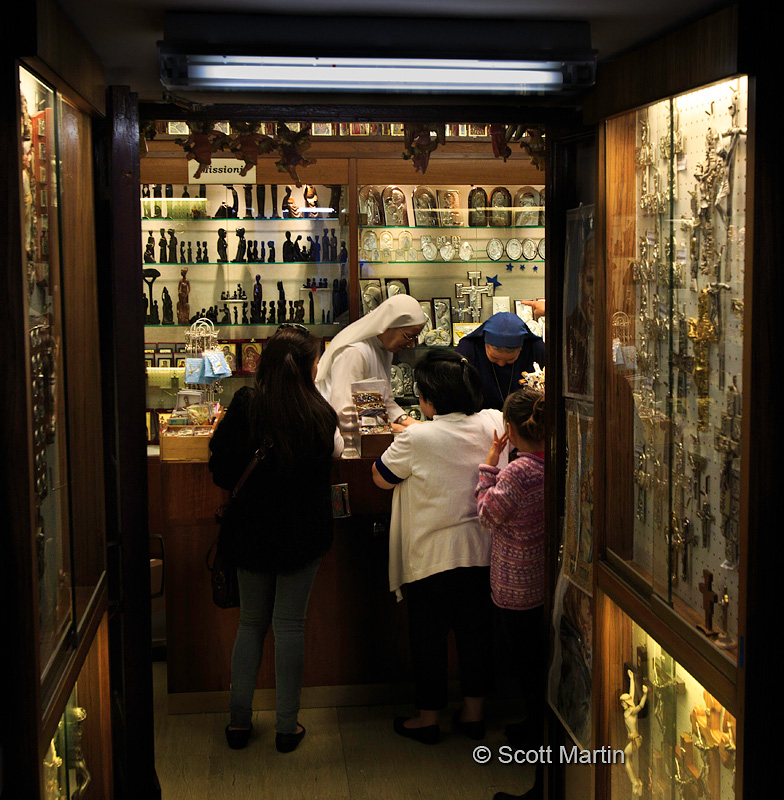
We left the Sistine Chapel and headed through a small maze of hallways that comprised a short cut to St. Peter’s Basilica, along the way passing a small store selling Vatican remembrances.
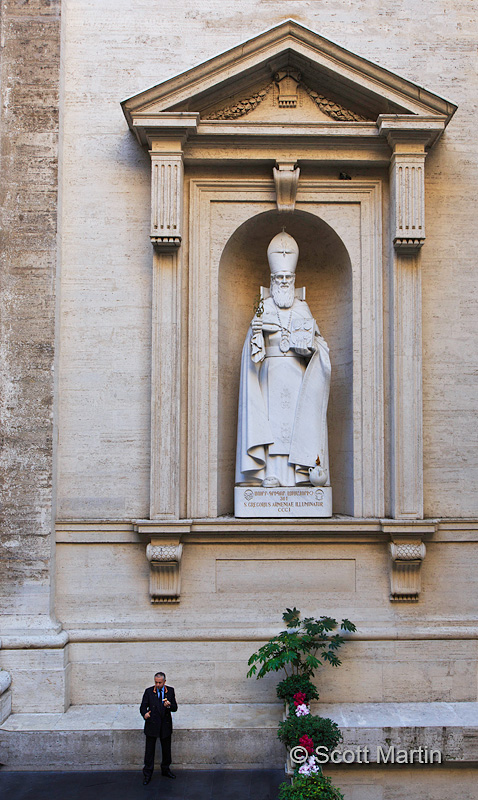
One of the many things I will remember from our day at the Vatican was the sheer size of everything, which is quite ironic given that the Vatican is the smallest country in the world. Even in an alleyway between the Sistine Chapel and St. Peter’s Basilica that sees little traffic, the person in the bottom of the next image provides a great example of the scale of the Vatican.
After concluding our time in Rome we headed to the train station to pick up our rental car and begin the next leg of our trip; the 540km drive to Venice, which will be the subject of the next blog posts.
by Scott Martin Photography | Oct 2, 2013 | Blog, Cityscapes, Educational, Travel
Vatican City is a 110 acre walled enclave within the City of Rome which has about 840 permanent residents. The Vatican City State was formally recognized as a sovereign state in 1929 making it the smallest internationally recognized State whether measured by geographic size or population. The fortification walls that define the Vatican were constructed under the rule of four popes between the years 847-1644. Although the Vatican now uses the Euro as currency, they do mint Vatican Euro coins which are highly sought after by coin collectors, as are Vatican postage stamps. The sale of stamps and coins is one of the Vatican’s prime methods of generating income for the state. The Pope is the sovereign head of the Vatican City State, having full and absolute executive, administrative and judicial power over Vatican City making him the only absolute monarch in Europe.
Deb & I spent a full day touring the Vatican, which included climbing some 500 stairs to the top of the cupola high above St. Peter’s Basilica which provided a fabulous view of St. Peter’s Square and the surrounding city of Rome. While in the basilica we also met and had a chance to chat with an Arch Bishop and a Cardinal which was a pleasant surprise. The buildings, churches, museums and chapels that make up the Vatican are visually stunning and it is difficult to properly capture their beauty photographically however I trust the images within this post give you a small sense and appreciation of the Vatican.
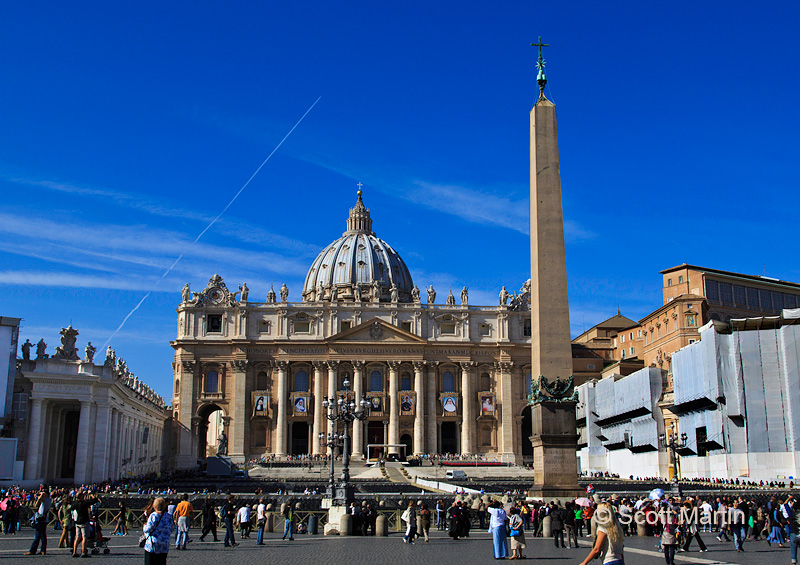
St. Peter’s Basilica and St. Peter’s Square with the Vaticano Obelisk at its centre form the classical view of the Vatican. The obelisk was carved in Egypt in 30 BC and brought to Rome in 37 AD. It is one of eight Egyptian obelisk’s in Rome and the only one that has not toppled since Roman times.

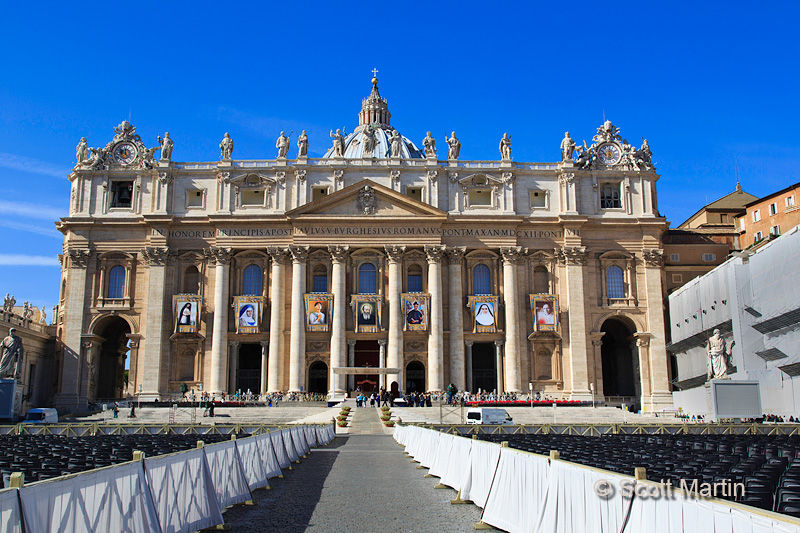
We were at the Vatican the day before the Pope presided over the canonization of seven people and as a result St. Peter’s Square was set up with chairs for the many thousand who would attend the service. The pictures of those being canonized were framed on the face of the basilica, including Kateri Tekakwitha, a Native Canadian who died 300 years ago when she was only 24.
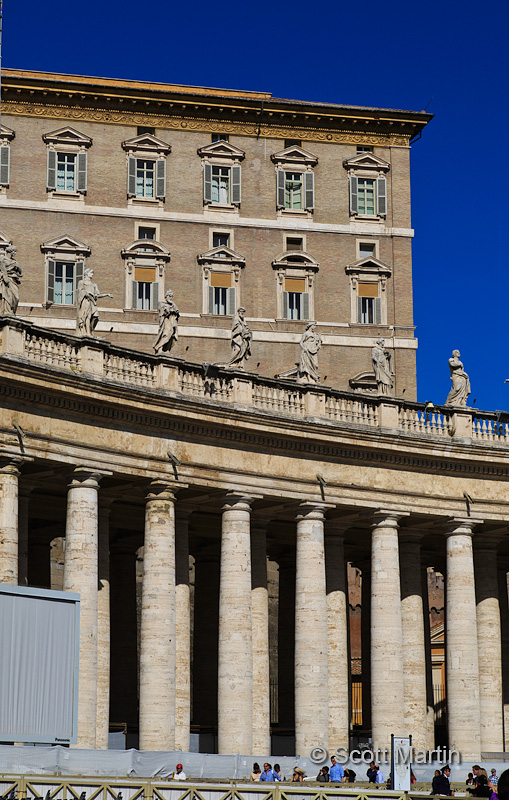
The Pope’s apartment over looks St. Peter’s Square and he addresses people from the top floor, second window from the right.
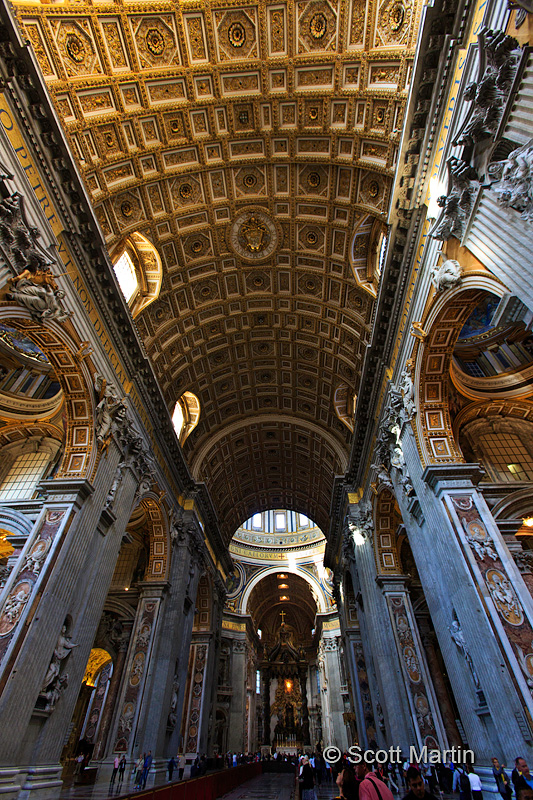
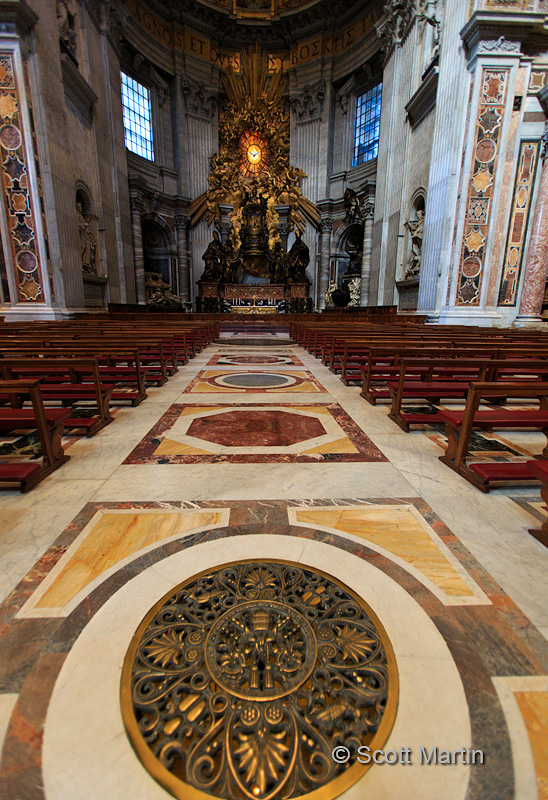
Upon entering St. Peter’s Basilica one is first taken aback by the sheer size of the church. It is so big it is hard to get a proper perspective. The church is designed in the shape of a Greek cross with a large central dome that covers the Papal Altar which can be seen in the back ground of this snap from inside the doors of the church.
There were a number of architects involved in the design of the basilica which was constructed in the early sixteenth century, most notably Michelangelo who was in his seventies when asked take over the design and construction of the church.
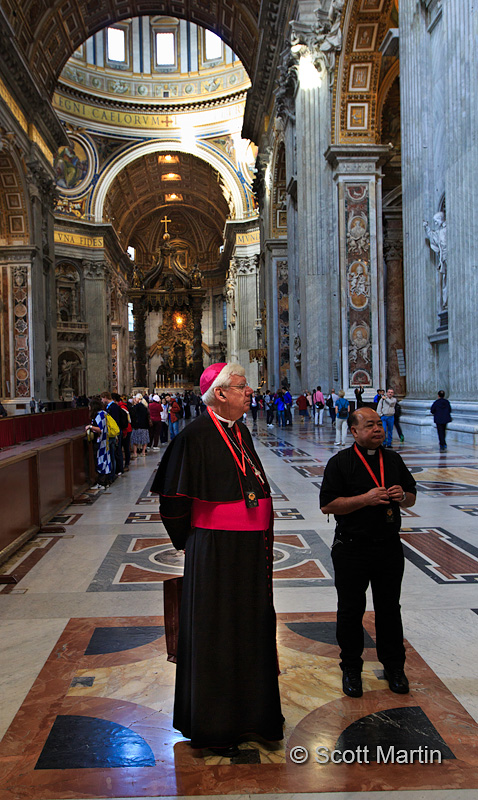
The basilica is probably the largest church building in the world covering almost six acres in area. The Papal Altar, covered by the central dome of the basilica is the central focus of the church. Only the Pope can use this altar, which is constructed over at least two others that preceded it and all covering the burial site of Peter, who was crucified upside down in 64 AD near the Egyptian obelisk that stands in the centre of St. Peter’s Square only a few hundred feet away from the altar.
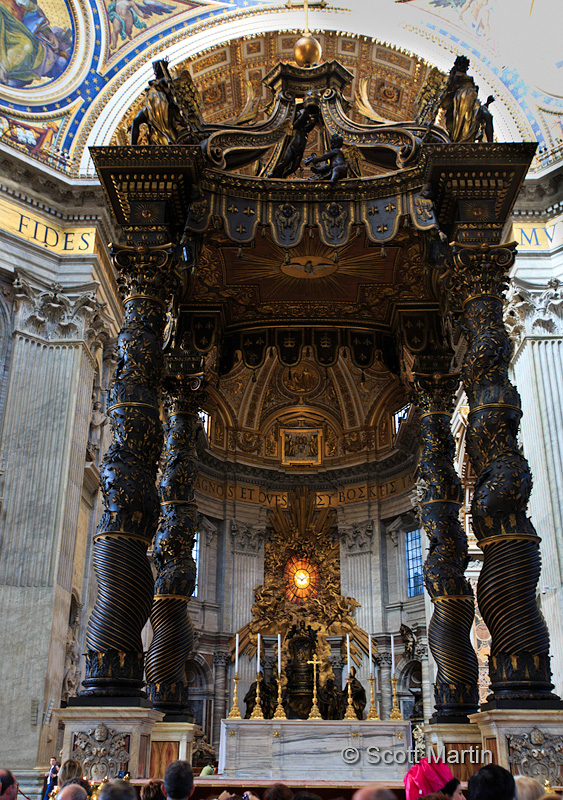
The actual altar is quite simple by Vatican standards consisting of a giant slab of Greek marble but the canopy, or baldacchino, that covers it is the visual centre piece of St. Peter’s Basilica. It is formed from a vast block of black Greek marble, gilded in bronze and standing ninety-five feet above the altar. The Papal Altar was consecrated in 1594 while the canopy was designed by Bernini and built in 1624.
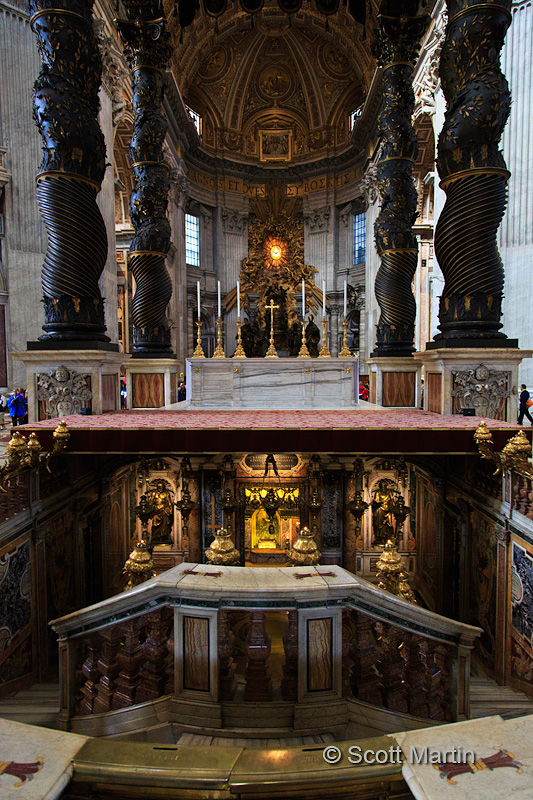
Directly below the Papal Altar is Peter’s tomb which is also below the grade of the main floor of the basilica. When a new Pope takes the historic walk to his investiture it begins at this tomb. Note the people at the sides of this next image to give perspective to the sizes involved.
Throughout the basilica there are many altars, confessionals, and works of art, all of which could be greatly expanded upon however for the sake of brevity I will only highlight a few. The first is the Cathedra Petri or Throne of St. Peter which was designed by Bernini and contains a chair that was originally said to be used by Peter himself however was subsequently shown to be from the twelfth century. Still a very old chair! The altar was completed in 1666.
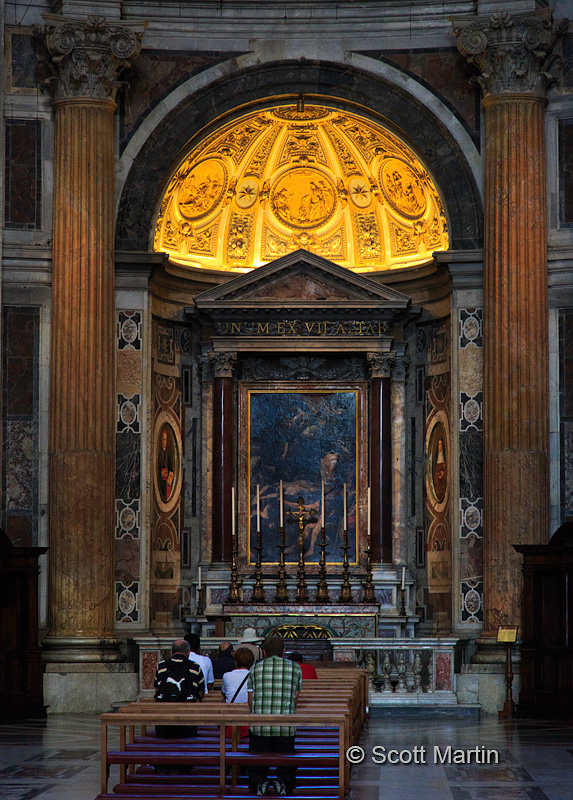
The Altar of Saints Processus & Martinian (two Roman jail guards converted by Peter while awaiting his crucifixion).
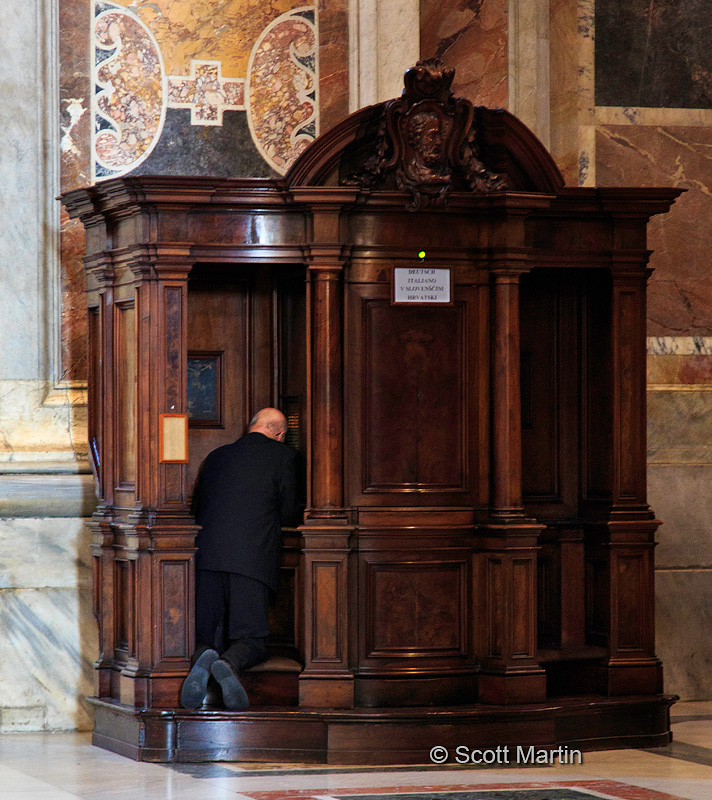
One of many confessionals in the basilica.
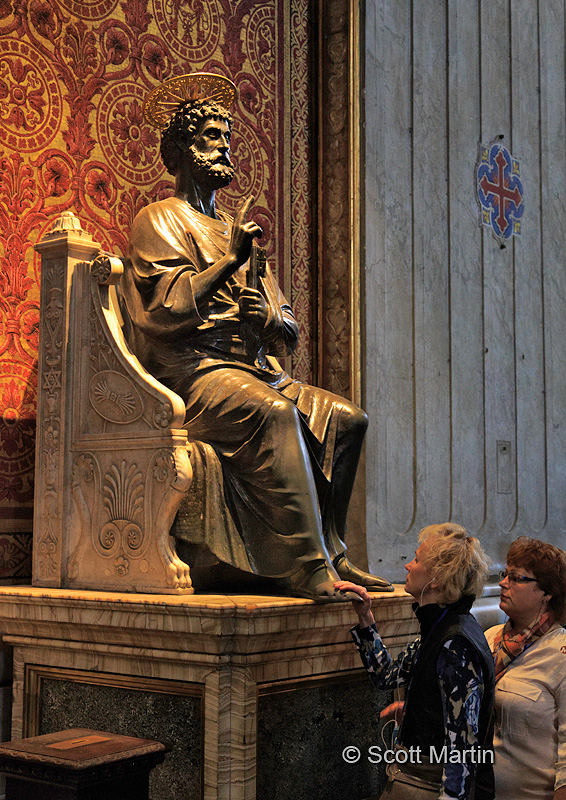
The statue of St. Peter is one of the most popular in the basilica and devotees line up to touch and kiss the right foot of the statue. This is a practice so common that the foot has been completely worn down by the countless people who have attended the statue since it was created in 1296.
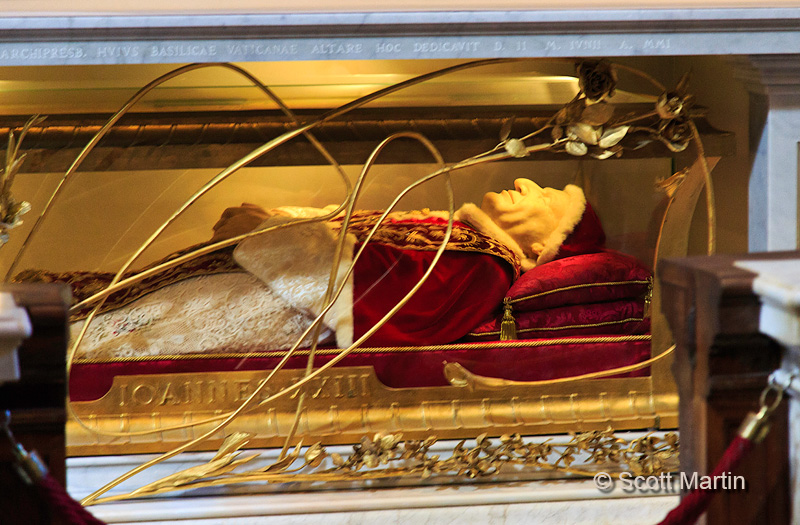
Beneath the Altar of St. Jerome is the resting place of Pope John XXIII who died in 1963. Just last week on September 30th, Pope Francis announced that Pope John XXIII and Pope John Paul II will be declared Saints on April 27, 2014.
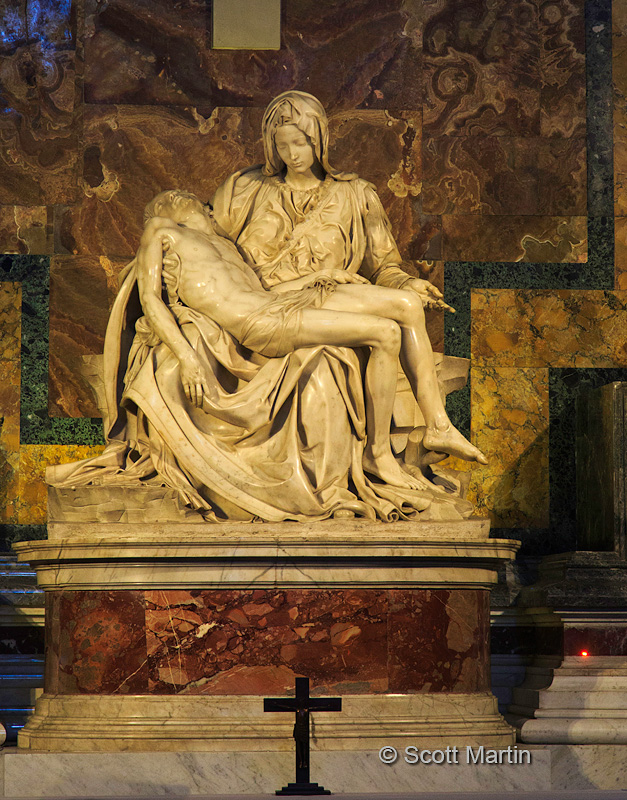
One of the most popular statues in the basilica is Michelangelo’s Pieta which was carved in 1498-1499 when Michelangelo was only 24. It is the only piece of art he ever signed.
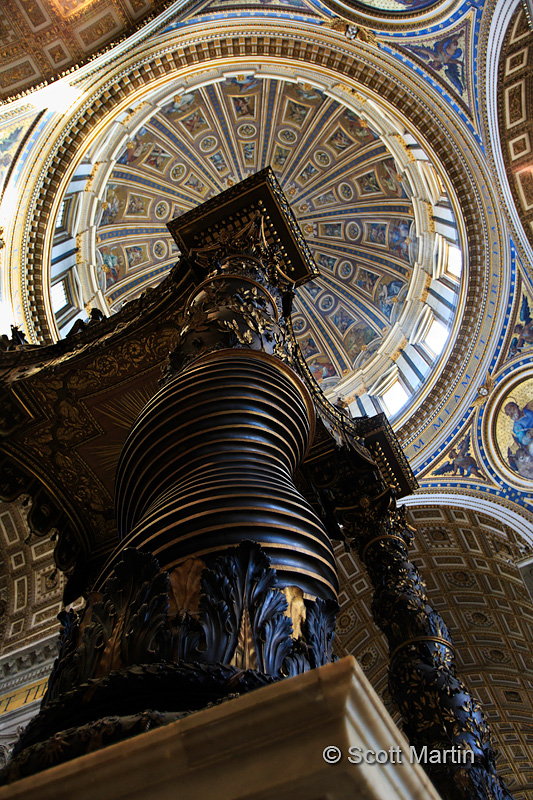
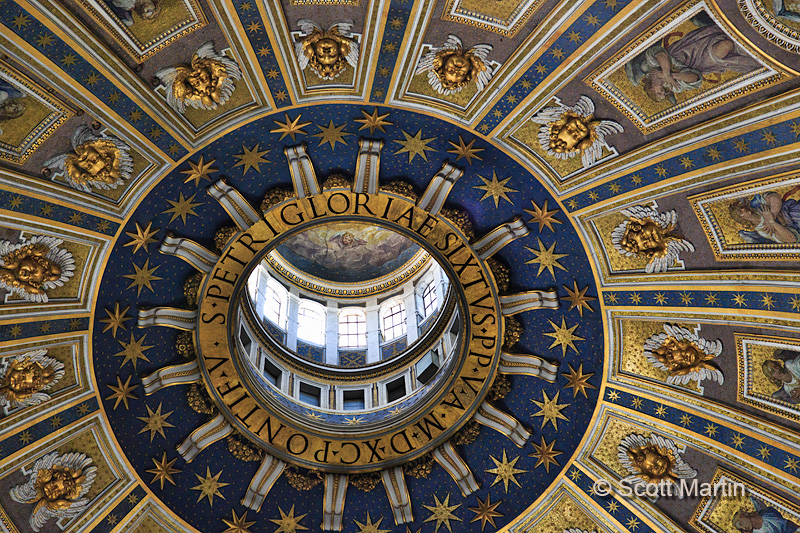
The dome above the Papal Altar is the highest dome in the world with the top of its external cross 450′ above the floor of the basilica and its internal diameter is just over 136′. This next image shows the dome from the inside looking up into the cupola.
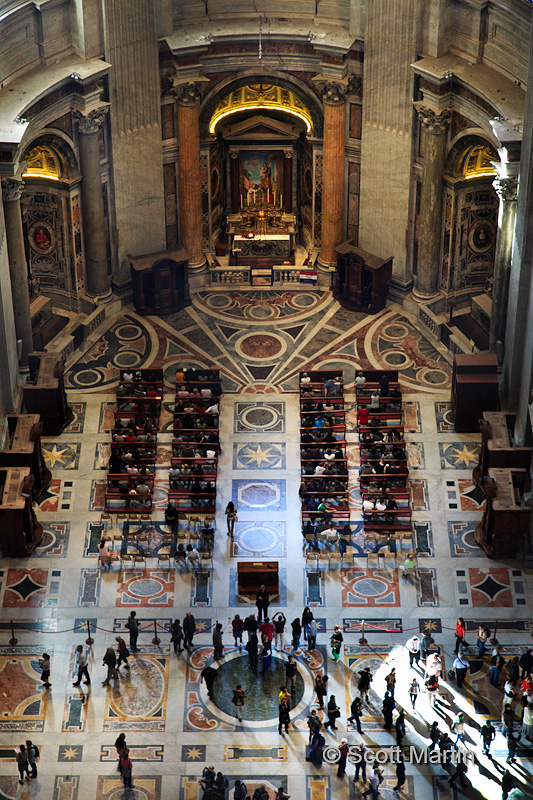
And from the top looking down into the basilica towards the Altar of St. Joseph, which is said to contain the relics of Simon and Jude in an ancient sarcophagus.
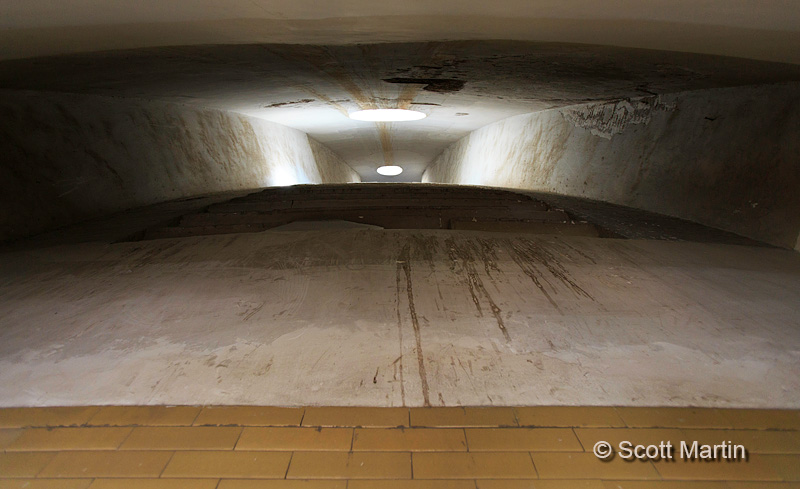
There is an extra fee required to visit the actual dome of St. Peter’s Basilica and then climb the more than 500 steps winding through the inner and outer dome shells, eventually arriving at an outside viewing area at the top of the cupola of the dome. The view from this vantage point is well worth the effort required to get there, although if claustrophobic it may prove a problematic journey.
Looking up towards the top of the dome from within the inner and outer walls.
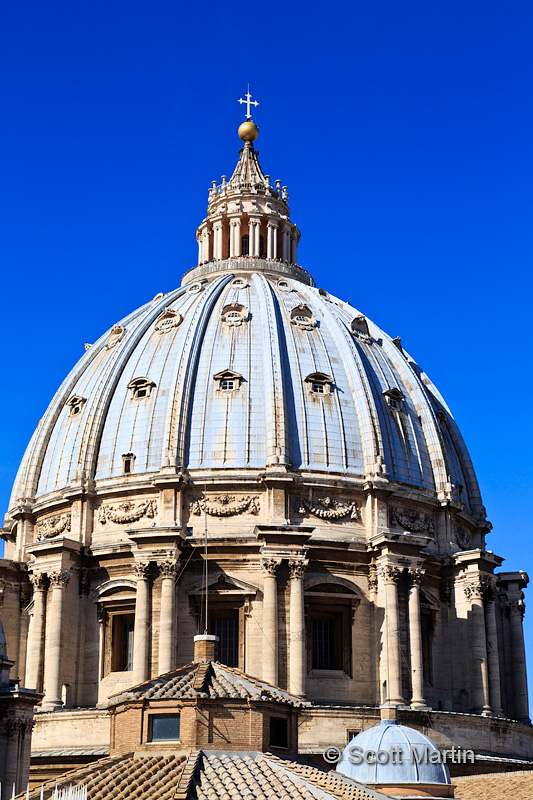
The dome as seen from the roof of the basilica. The viewing rail is at the base of the cupola on the top of the dome.
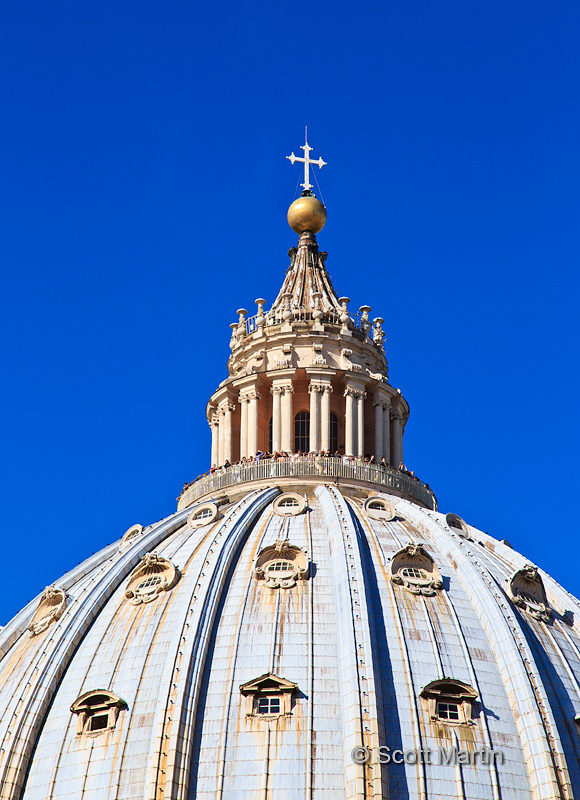
A closer view, which also provides some perspective as to the enormous size of the dome.
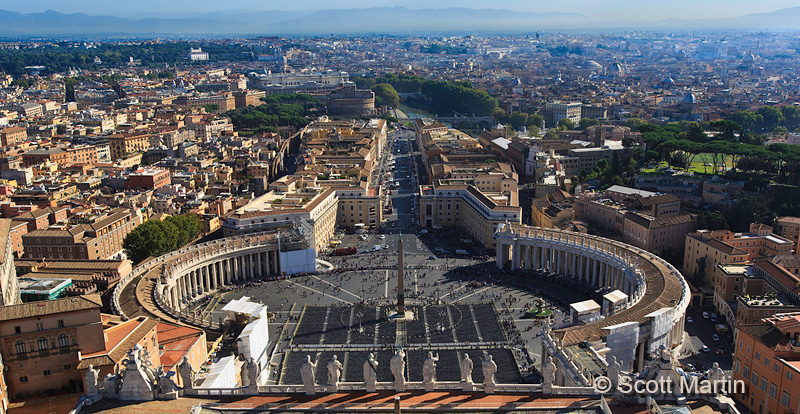
The spectacular view of St. Peter’s Square with its central obelisk and the surrounding Roman countryside as viewed from the top of the dome.
Across the top of the front facade of the basilica are thirteen travertine statues, the largest being Christ standing 19′ in height and flanked by John the Baptist and eleven apostles. Interestingly, the missing apostle is Peter.

Originally I had planned to do one post on the Vatican City however given the length of this blog entry it is probably best I stop at this point and continue on with the Vatican Museum and Sistine Chapel in another post.
Thank you for working your way through this post and I trust you’ve learned something new about the Vatican.
by Scott Martin Photography | Jul 14, 2013 | Birds, Blog, Educational, Loons, Wildlife
Time seems to be conspiring to pass more quickly this time of year and as a result it has been far too long since the last blog post. In order to get something posted, this will be a short blog however the hope is that it will whet your appetite for more Moose & Loons in the upcoming weeks.
Last month I had the privilege of joining my good friends Arni, Eleanor and Joyce in Algonquin Park for three days of photography, during two of which we participated in a Moose Photography Workshop with Michael Bertelsen who owns and operates Algonquin Park Photography Tours & Workshops. I had met Michael a couple of years ago at Hall’s Road in Ajax, Ontario where we were photographing birds and it was a pleasure to catch up with him again. Michael has been conducting tours in Algonquin Park for some fifteen years now and his familiarity with the park and expertise and knowledge of Moose was indispensable, not to mention his customized ‘photography boat’ which featured four swivel chairs and lots of room to shoot from any direction while on the boat. We left the dock at 5:00 a.m. and headed for an 18km ride to where the Moose could be found…..and Moose we found; about twenty of them over the two days!
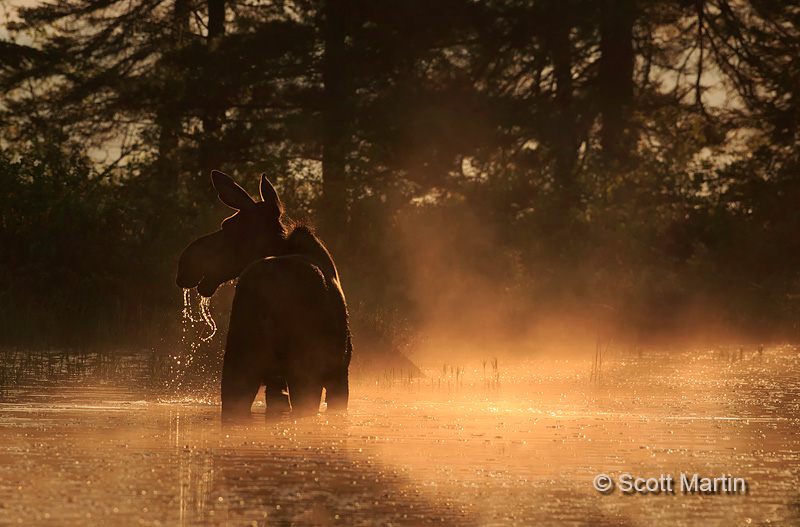
The purpose of this blog is not to show all the best Moose images (that will come) but rather just a couple that were taken very near sunrise. The importance of being ‘on location’ before the sun rises can not be over estimated. There are a scant few moments while the sun peeks above the horizon that provide photographic opportunities like none other. It is also a time you can shoot into the sun and achieve interesting effects with back and rim lighting.
This first image is a good example of the rim lighting effect possible when shooting into the early morning sun.

Although compositionally you may wish the Moose was on the other side of the frame so she was looking into the frame rather than out of it; the mist coming off the water, the rim lighting around the head and through the water drops makes for a good image. From a technical perspective, it is important to underexpose the exposure suggested by your camera’s light meter when shooting into the sun. If you don’t, the camera will expose for the predominantly dark scene resulting in over exposure of the light areas which would destroy the rim effect and blow out the detail in the lighter parts of the scene (in this case the water drops and the mist). If memory serves me well, this shot was taken at two stops less than what the meter was suggesting.
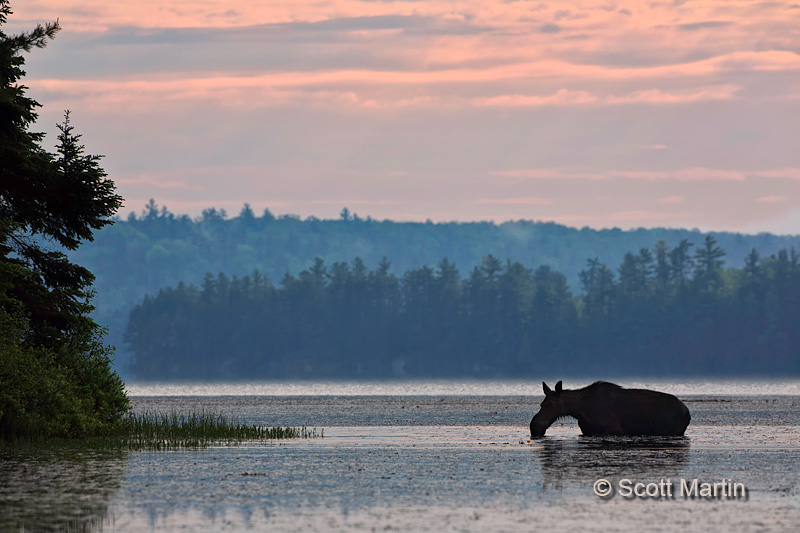
The next image is what we often refer to as an environmental shot, meaning that although the Moose is the object within the image, it shows the Moose in its natural environment which is always important, and nice, to see. Unfortunately, my tendency is to dwell so much on the object of the photo shoot that I completely forget about the environment and consequently come home with many gigs of images that all look the same, with the object filling the full frame. Often environmental images make for the highest visual impact and therefore become the best images from an outing.
As the sun moves higher into the sky through the morning hours, the light becomes more intense and harsh, which is why most photographers do not go out after mid-morning or before mid-afternoon. Shooting into the sun becomes much more difficult to do effectively as the light intensity fluctuation between the lights and the shadows becomes extreme. This past Friday morning my wife and I were canoeing in Algonquin Park and photographing Common Loons. While were just finishing up for the morning with a pair of Loons, Deb heard the unmistakable sound of a Loon taking off. Fortunately it was heading in our direction but unfortunately we were looking almost directly into the sun. I quickly grabbed my other camera body with a longer lens and was able to get a couple of unexpected frames as the Loon completed its long take off and flew right beside us on its way to a better fishing location.
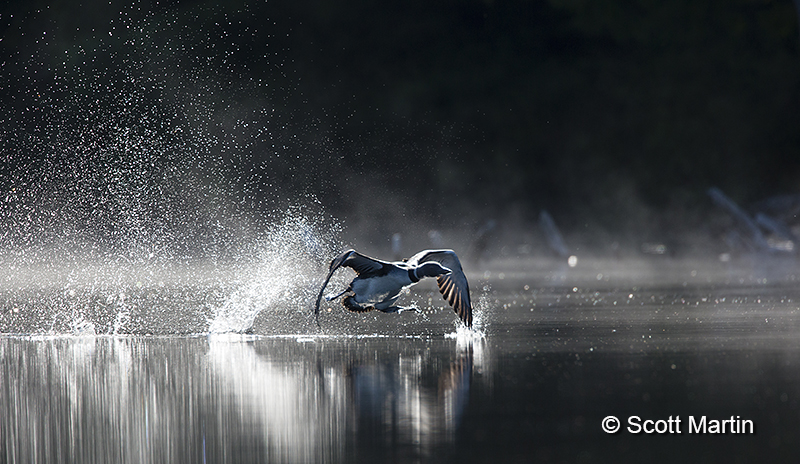
You can see how much harsher the light becomes later in the morning, in this case around 8:00 a.m. For this sequence, I exposed three or more stops less than what the meter was suggesting. It was a treat to be so close to an in flight Loon as it passed by our canoe. This next image is a little off level, however if it was leveled some of the reflection of the Loon would be lost and I felt it was more important to include as much of the reflection as possible at the expense of a level horizon!
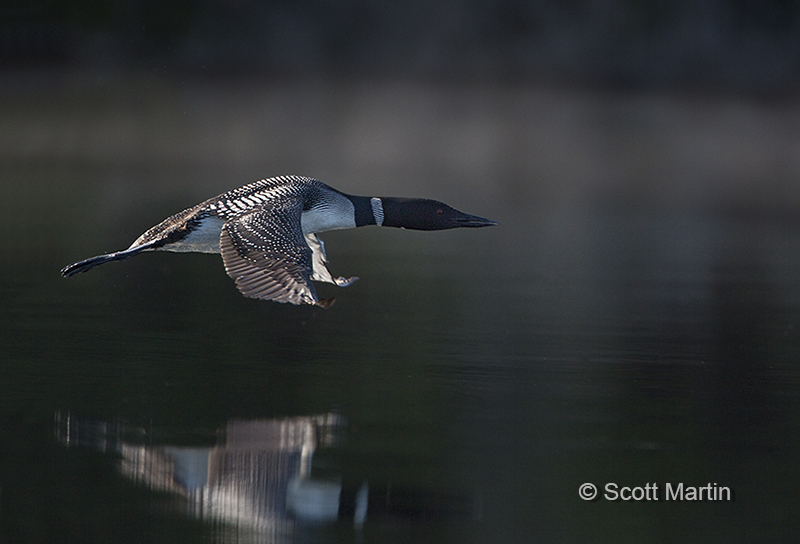
The interesting thing about all four images posted today is that were all taken from the water, which means a little more planning is required to make it all happen, but the results are well worth the effort.
by Scott Martin Photography | May 29, 2013 | Birds, Blog, Educational, Wildlife, Woodpeckers
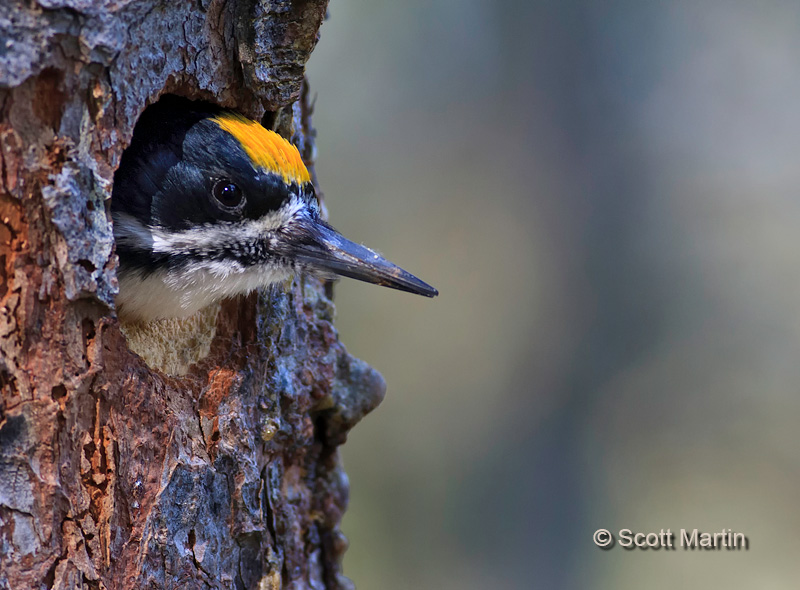
For many years now, every time Deb & I head into Algonquin Park for a day trip, we have been on the look out for the uncommon and equally elusive Black-backed Woodpecker. We had struck out every time until this past Victoria Day Weekend when Ellesse & Jeff and Deb & I were fortunate enough to see a pair while on our annual Spring trip to the park to see moose. Unfortunately I was unable to get any pictures of the woodpeckers, so Deb & I returned two days later just after sunrise and were blessed once again to find the Black-backed Woodpeckers and this time their nest as well. It was a real treat to watch them for a few hours and observe their unique behaviour as they tended to the nest and the eggs they were taking turns incubating.

.
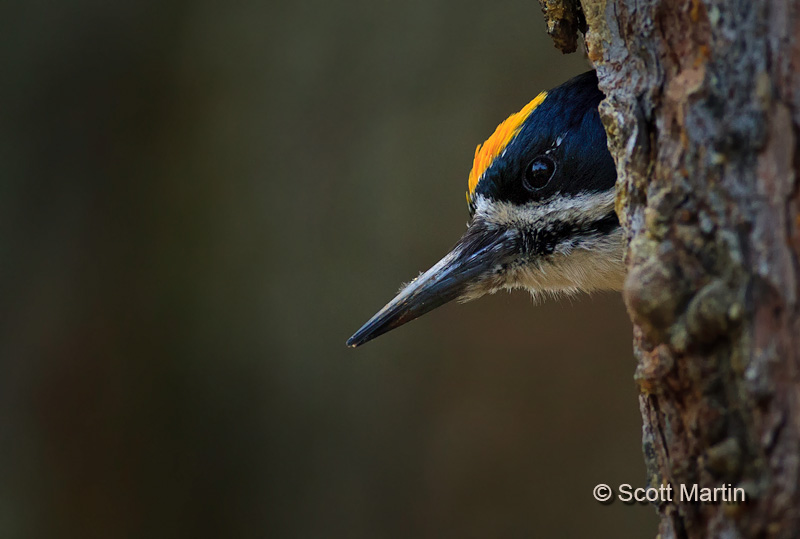
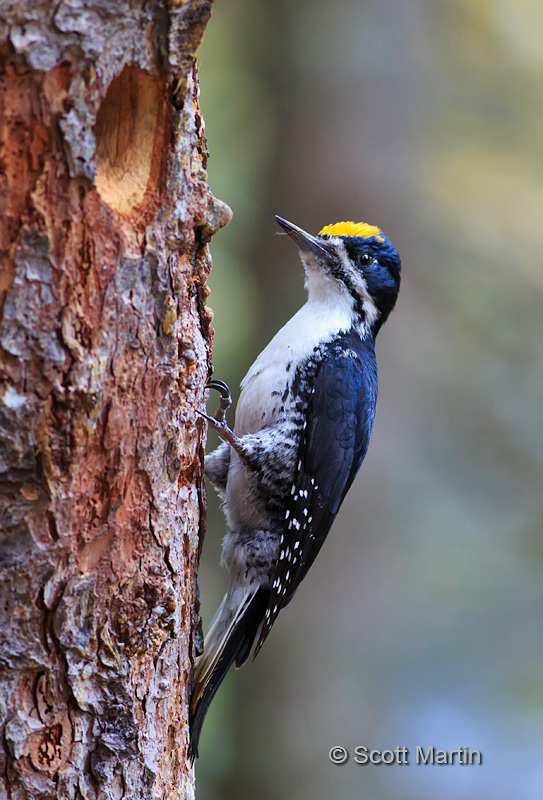
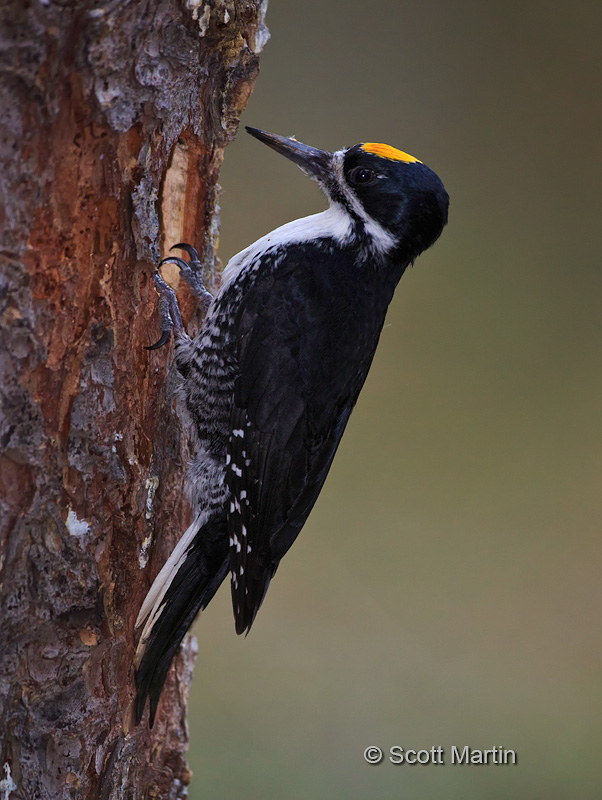
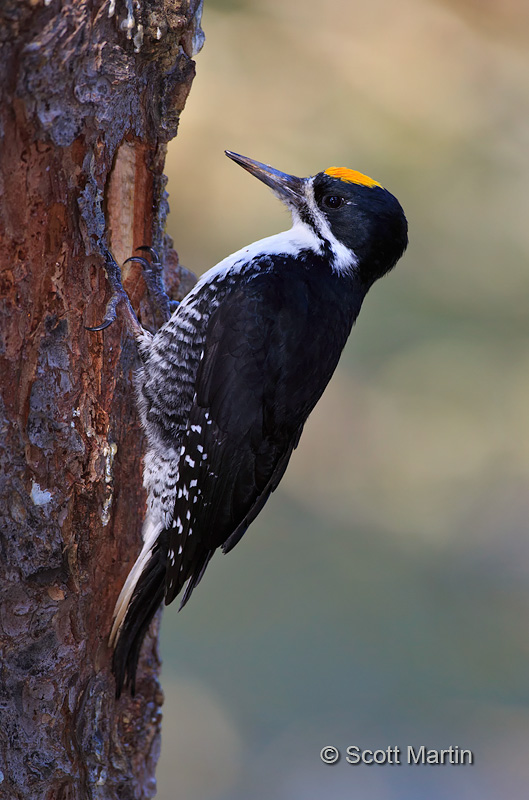
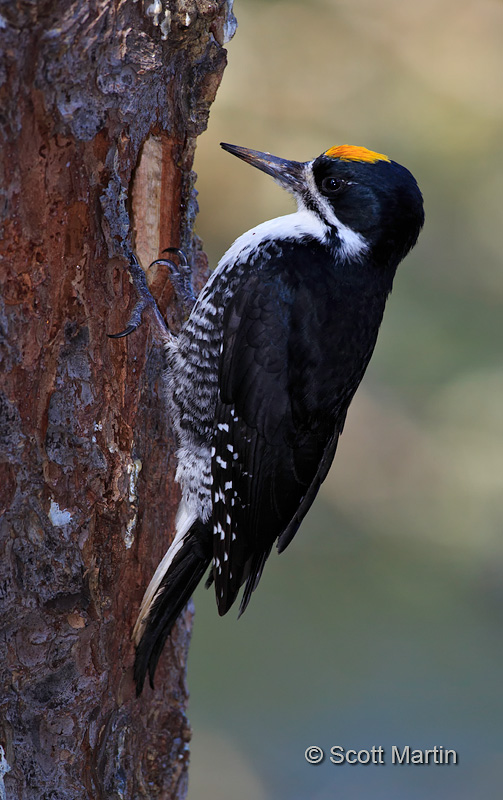
The above two ‘peekaboo’ shots are of the male, who is identified by the yellow/orange crown, while the female crown is black. The above two pictures, although compositionally similar, are taken from opposite sides of the tree resulting in differing back grounds and completely different lighting (front lighting in the first and back lighting in the second). Over all my preference is for the second shot, but by way of practice, when given the opportunity always photograph the subject from as many different angles and lighting configurations as possible. You will often be surprised by the results, even when breaking the unwritten rules of photography!
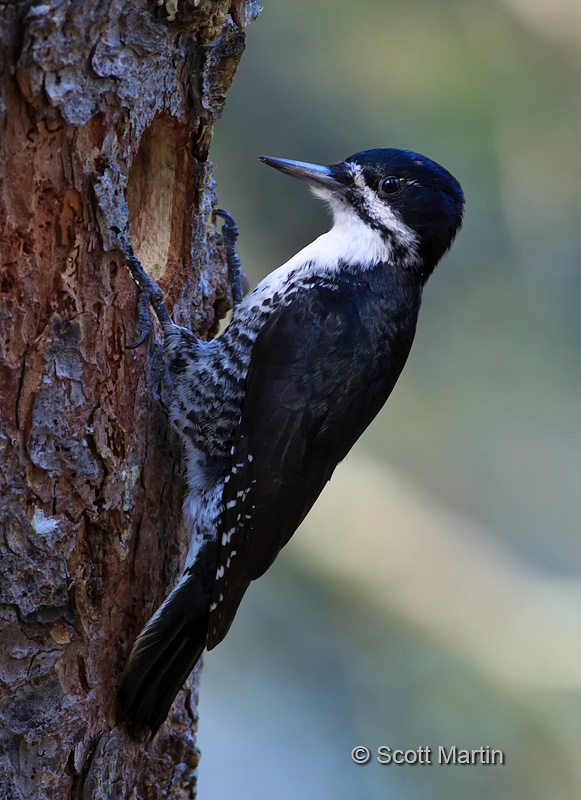
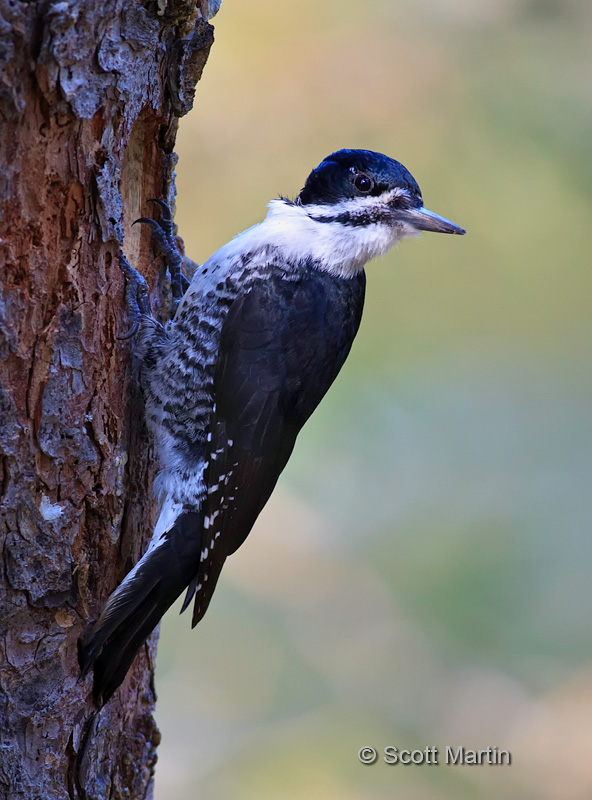
Black-backed Woodpeckers are a medium-sized woodpecker averaging about ten inches long with a wing span of seventeen inches. As their name suggests they have entirely black backs with a white chest and barred flanks. Their beaks are relatively long and they have a prominent white cheek mark. Another interesting fact regarding this bird is that they have only three toes.
The following images are of the female Black-backed Woodpecker.
.
.
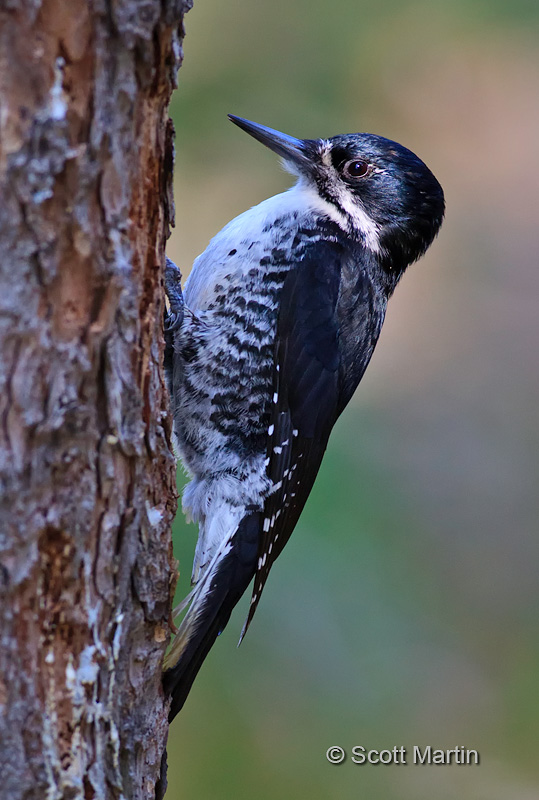
.
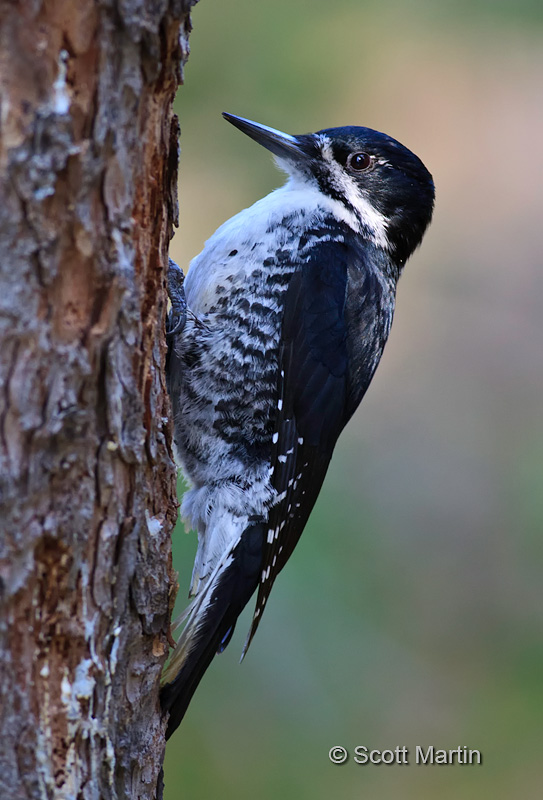
.
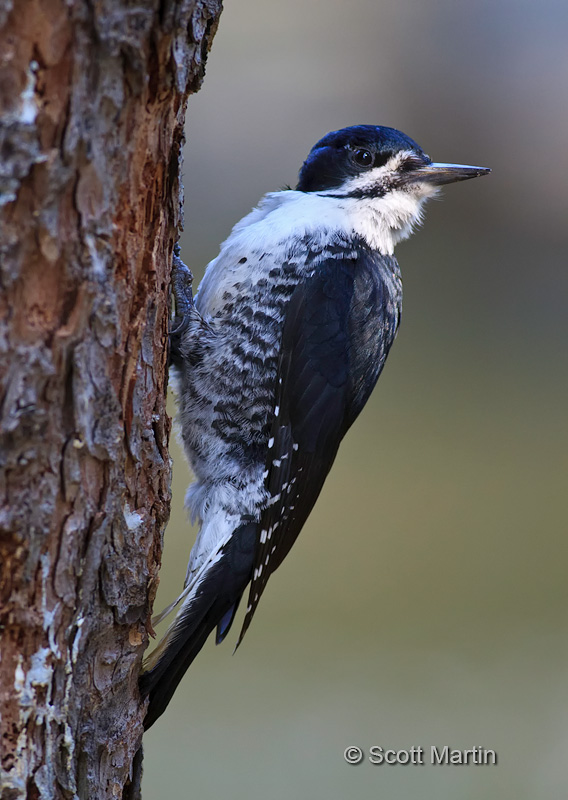
Black-backed Woodpeckers carve out a new nest every year in April or May, generally in a dead tree or a burnt tree. Although they typically live in the coniferous trees of boreal forests, they are known for preferring areas recently damaged by forest fires. The nests are generally located fairly low to the ground. The female lays three or four eggs which are incubated by both parents for 12-14 days. Interestingly the male alone incubates the eggs during the night. Once born, both adults feed the chicks which fledge after about twenty-four days.
As already mentioned, Black-backed Woodpeckers only have three toes and it was harder than expected to get a good shot demonstrating that. This next shot shows the bird sticking his foot out seemingly just to show off his three toes for the camera!
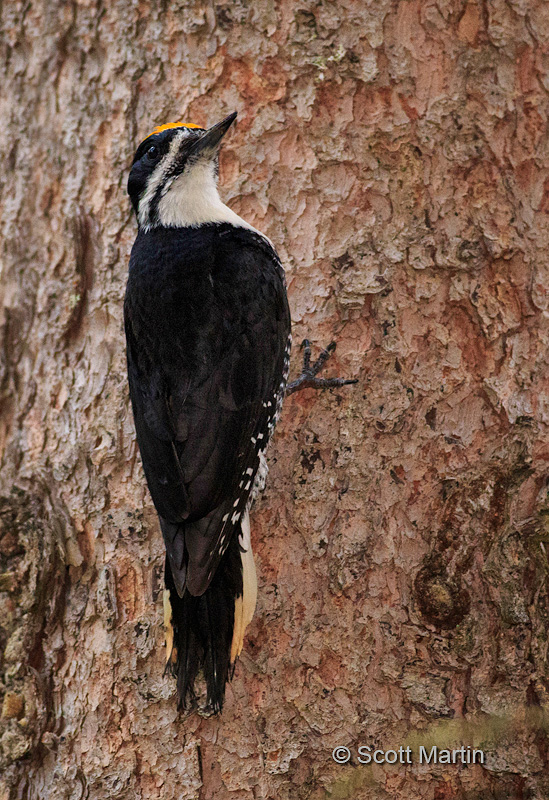
The next images are of the male.
.
.
.
More woodpeckers can be viewed in the Woodpecker Gallery.
The images in this post were taken using both 1D Mk III and 5D Mk III bodies and 400/5.6 and 500/4 lenses in various lens body combinations. It was a very dark gloomy day, with the exception of about twenty minutes of sunlight over the time we were at the nest site. This resulted in higher ISO’s than usual, with some of the images in this series taken at ISO 4000. Fortunately the newer cameras function extremely well at ISO’s that were unusable with the technology available just a few years ago.
As mentioned above, we found the Black-backed Woodpeckers while in the park looking for moose. Here is one of them taken with the 5D and 70-200/2.8.
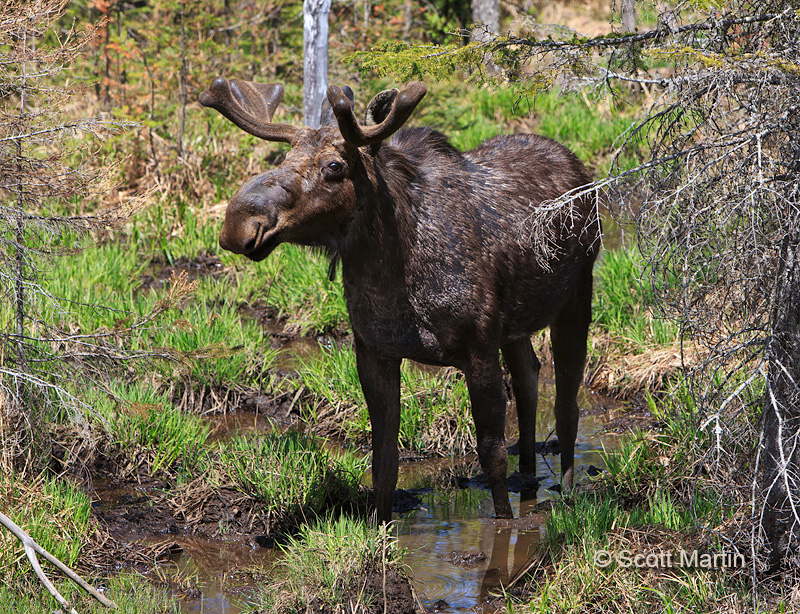
by Scott Martin Photography | Apr 13, 2013 | Birds, Blog, Educational, Song Birds
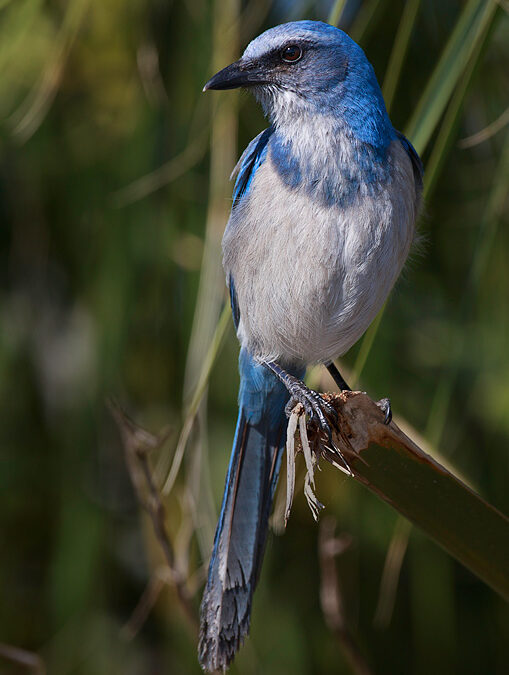
The Florida Scrub Jay is Florida’s only endemic bird and one of only fifteen bird species endemic to the United States. It is believed that there are approximately 8,000 Florida Scrub Jays alive and their numbers are decreasing at a rate of approximately 10% every ten years. As a result of their rarity and decreasing numbers they have been listed as Vulnerable, which means that unless conservation action to restore their dwindling habitat is taken they will become threatened.
As the Florida Scrub Jay is only found in Central Florida, the bird tends to be a celebrity among birders who travel long distances to see one. In fact, Deb & I met a couple from Sweden who had travelled to Florida last month just to see a Florida Scrub Jay. It was our pleasure to take them to an area where Scrub Jay’s were nesting and they were able to check another species off their life list. An interesting characteristic of the Scrub Jay is their inquisitive, social nature that renders them very tame. They readily land on your hand, shoulder or camera lens waiting to be fed a peanut. This comes as a complete surprise when you first encounter Scrub Jays as although they may be rare and difficult to find, when you do, they are instantly your best friends.
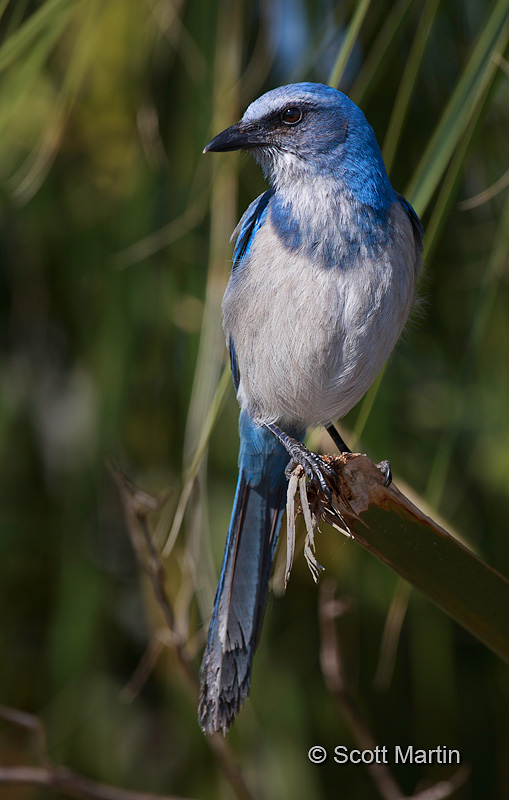
They do look similar to our Blue Jays and are about the same size as well.
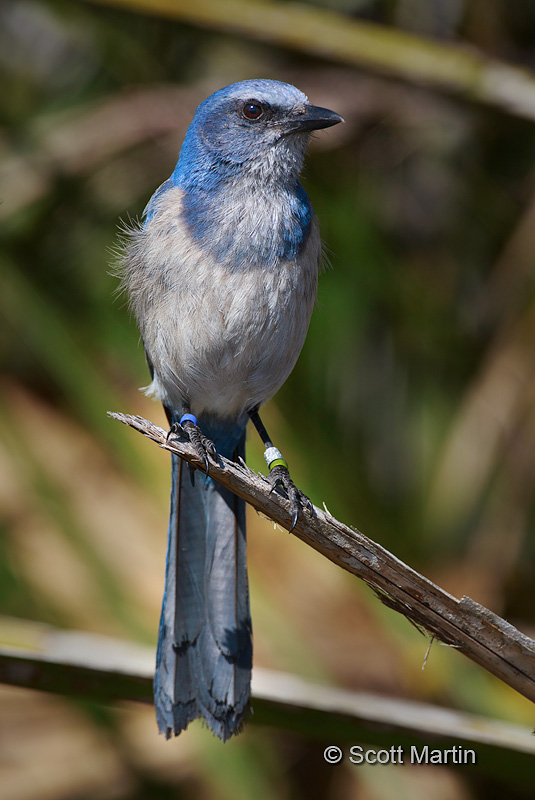
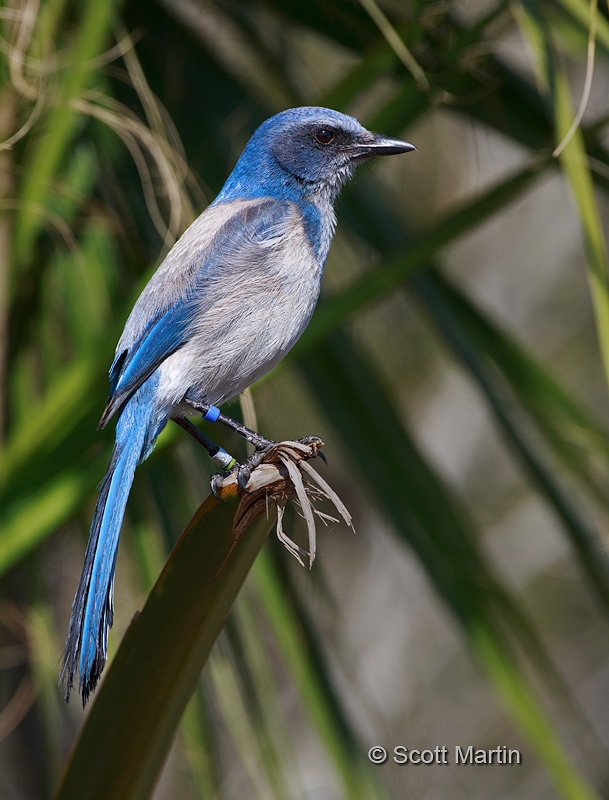
Due to their friendliness and unique stature Florida Scrub Jays are among the most studied of all the birds. Consequently most seem to banded, much like we see with our Gray Jays in Algonquin Park. Scrub Jays normally have three or four bands, a silver metal band with an ID # from the US Fish & Wildlife Service, plus two or three coloured plastic bands which indicate when and where the bird was banded. The banding of birds allows researchers to monitor the movements of birds within their range as well as record other data. The next image shows a banded bird.
The next profile shot illustrates their lack of wing colour and detail as typical with our Blue Jays.
.
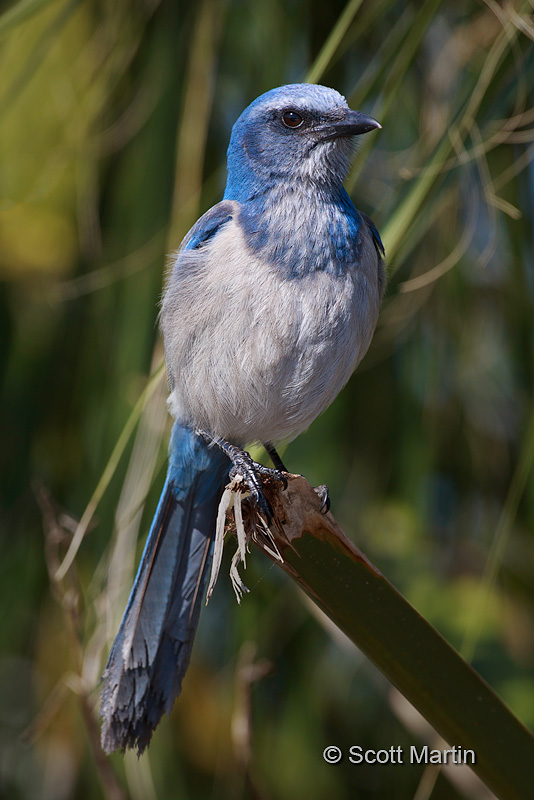
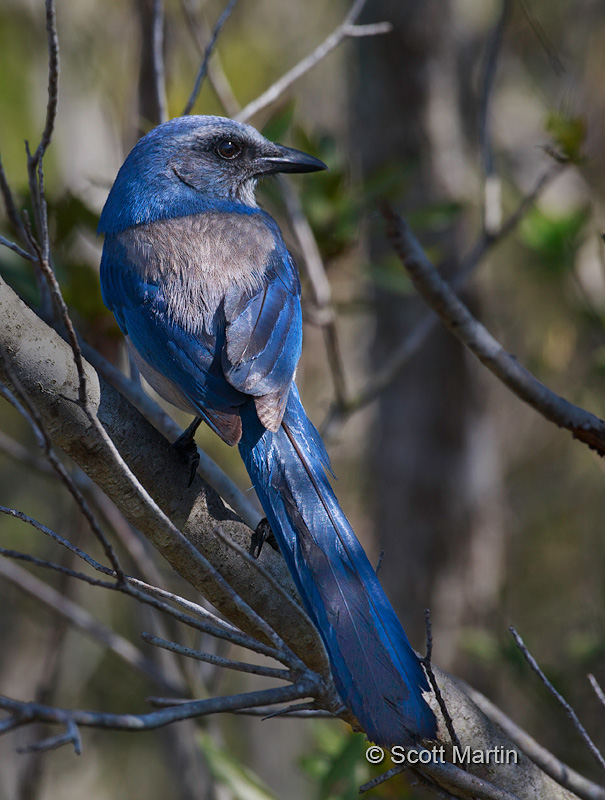
It was hard to get a good shot of the back of Scrub Jay, so please excuse the busy back ground in this next image.
Other Scrub Jays can been viewed in the Jays Ravens & Crows Gallery
From a photographic perspective, getting bird images that are more than just snapshots requires controlling as much of what the final image will look like as possible. For me that involves thinking about the back ground as much as the object, which is not an easy thing to train yourself to do. When was the last time you looked through your viewfinder and thought as much about what was in the back ground as you did the object? If you are like me, you may not have thought about the back ground at all! A few suggestions to help improve your results next time out are; look for the least cluttered back ground as possible, look for uniform light density throughout (avoid bright spots, especially ones that encroach on the object), try to get as much distance between the object and back ground as possible which helps blur the back ground and isolate the object. Don’t forget to move around with your feet or zoom with your lens to help accomplish the above suggestions. In terms of thinking about the object, next to ensuring proper focus, exposure and light direction, for me the most important thing is to avoid shadows on the bird. This is not always possible due to the nature of bird photography however it is always the ideal. Have a another look at the second image in this post and see how distracting the shadow on the tail is…almost ranking up there with the bands! The last image is greatly hampered by the cluttered background (which is exacerbated by the lack of separation between the object and back ground) and that half of the tail is under a shadow, however as is often the case, it was the only frame that clearly showed the back of the bird, no matter how hard I tried to get that ‘keeper’ shot of the back.
So next time, try to think about the things that will help move your results from snapshots to photographs, but never think so much about the results that you don’t enjoy your time out with your camera!
All the above images were taken with a Canon 5D MkIII and 500mm lens using a Jobu monopod and Jobu Jr. 3 gimbal head.
by Scott Martin Photography | Mar 25, 2013 | Birds, Blog, Educational, Song Birds
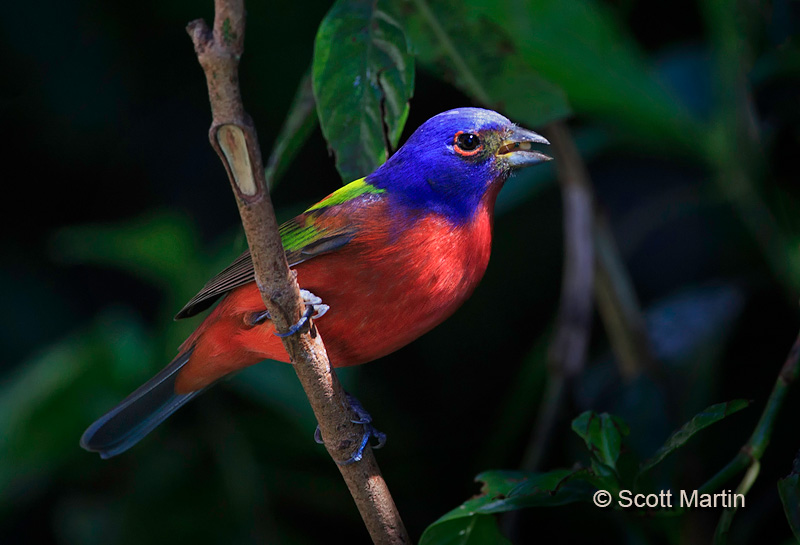
While in Florida this month Deb & I spent a couple of days visiting Merritt Island National Wildlife Refuge on the Space Coast of Florida. Actually Merritt Island is the Space Coast as the Wildlife Refuge shares the island with NASA. We were fortunate to see and photography a number of different birds on the refuge including Scrub Jays, Northern Shovellers, Greater Scaup, White Pelicans and the subject of today’s post, Painted Buntings, which neither Deb nor I had ever seen before.
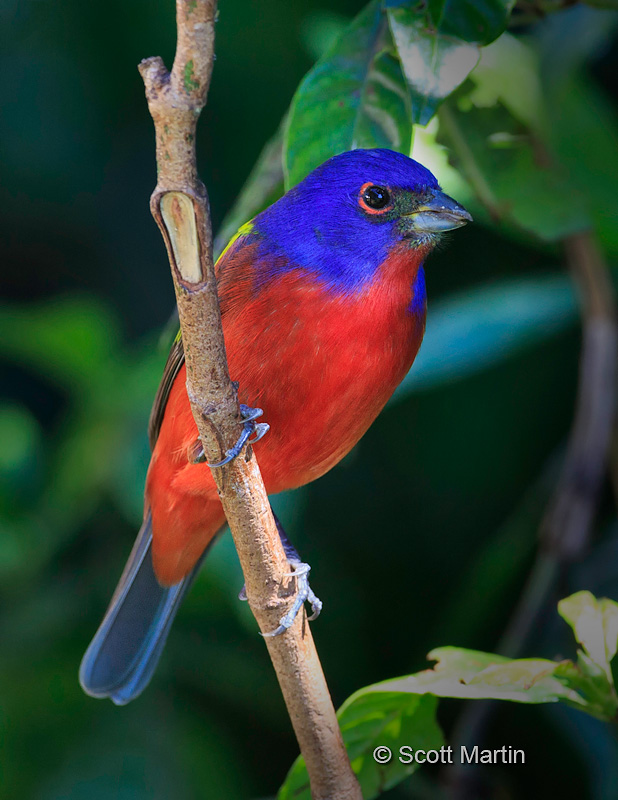
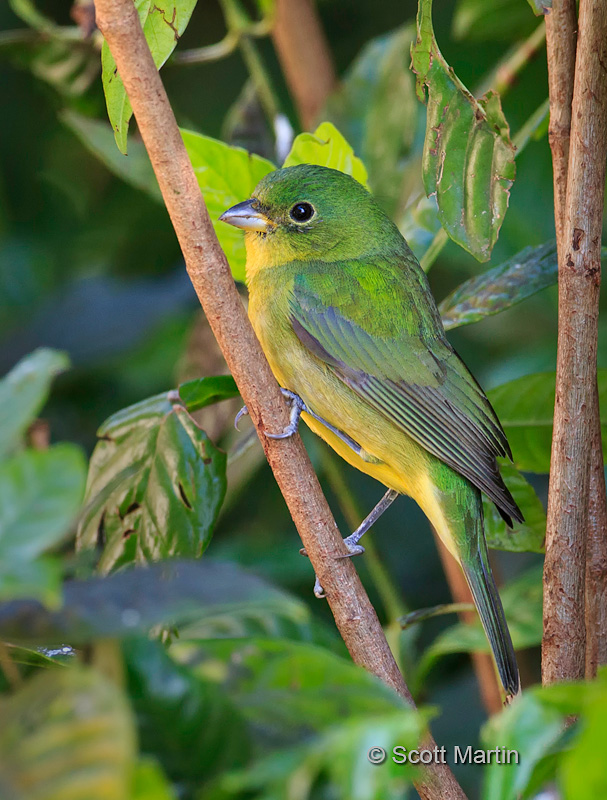
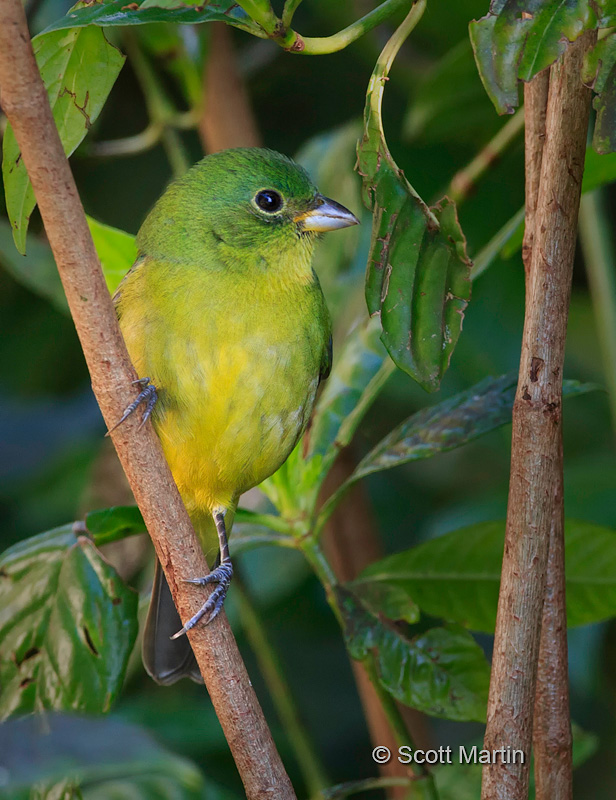
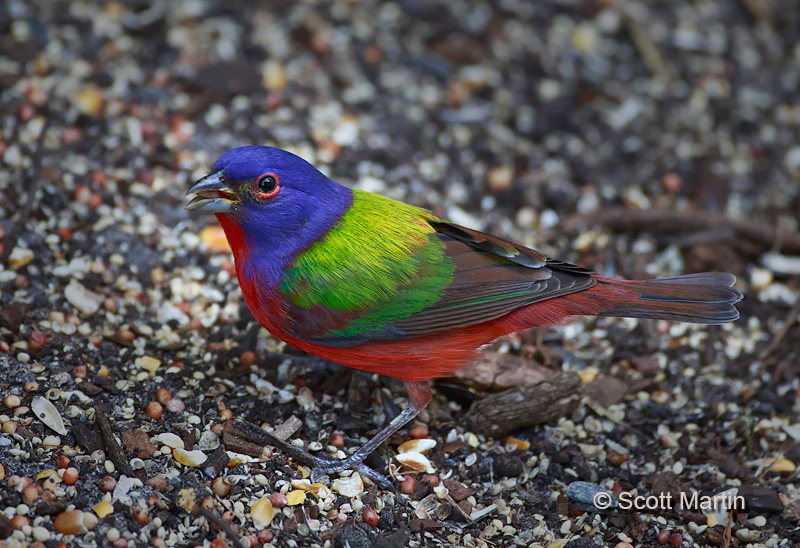
Painted Buntings are native to North America and generally noted as our most colourful bird. This makes identification of the male Painted Bunting very easy, even though not many get to see them. The female, although more uniform in her yellow green colour, is also easy to identify as they are the only all green bird found in North America.

These beautiful buntings are from the same family as the Cardinal and the three pairs of Painted Buntings we observed were foraging for seeds with a Northern Cardinal pair. The buntings are a little smaller than the cardinals. Painted Buntings are mostly found in dense thickets and shrubs and are relatively hard to find birds that don’t often provide for nicely perched photographs. You need to be fast, prepared and fortunate to get a good shot.
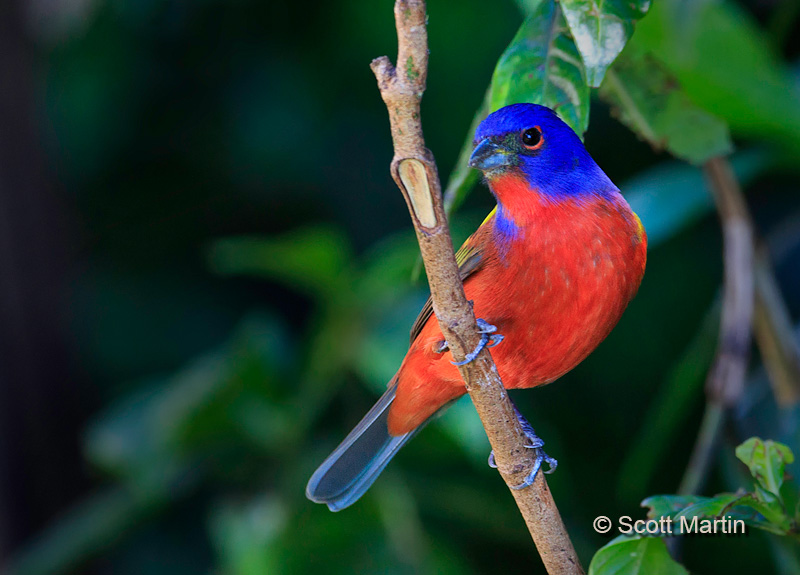
Painted Buntings are found the southern American States and into Central America. Their numbers are on the decline with an estimated 60% reduction in population over the last fifty years. This has been attributed to factors including egg destruction by Brown Headed Cowbirds, urbanization of the riparian habitat they enjoy (transition vegetation between rivers and forests) and climactic change. Although illegal, male Painted Buntings are sometimes trapped, caged and sold as pets which has also reduced their numbers. The Painted Bunting is listed as ‘Near Threatened’.
As mentioned earlier the female Painted Bunting is green in colour (a unique distinction for North American Birds) which makes it perfectly camouflaged for its chosen environment. They are easy to hear but difficult to spot as the next couple of images illustrates.
.
Painted Buntings often forage for seeds along the ground as seen in this last image, which although not a great shot, does show the bird’s many colours and that it truly deserves its reputation as the most colourful bird in North America. Often times bird photographers just get lucky (or have been prepared and given the opportunity enough times) even while ‘breaking’ all the rules of good photographic technique. This shot is one of those times as it was a single frame taken hand held, looking down at the bird using an aperture of f/4 and shutter speed of 1/250 sec with a 500mm lens. I wont take the time now to explain why, but if you are a photographer you will know that this shot could be attempted a hundred times and would be blurry and out of focus ninety nine of those times. There must be some truth to the old adage of it being better to be lucky than good!
All of the images in this post were taken using a Canon 5D MkIII body and Canon EF 500mm IS L lens.


Follow Scott Martin Photography