by Scott Martin Photography | Mar 1, 2013 | Birds, Blog, Educational, Raptors, Wildlife
After reviewing the Great Gray Owl shots Deb & I were able to capture in Ottawa a couple of weeks ago, I found a few more that were perhaps nice enough to post.
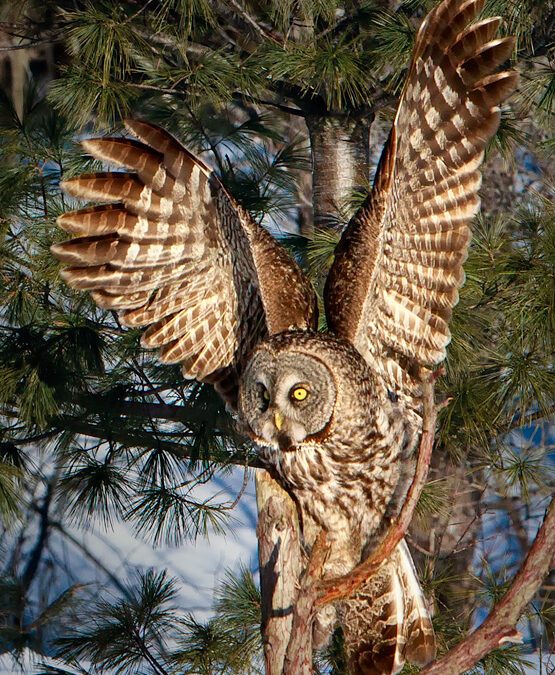
Although the Great Gray Owl is exceeded in weight by a number of other owls, its large head and long tail help it to be the largest and tallest Owl known in the world. Female adults are almost three feet in length with a wing span of five feet. The average female weighs three pounds although Great Grays have been found as heavy as four pounds.
With their wings outstretched you get a glimpse of just how large these owls are.
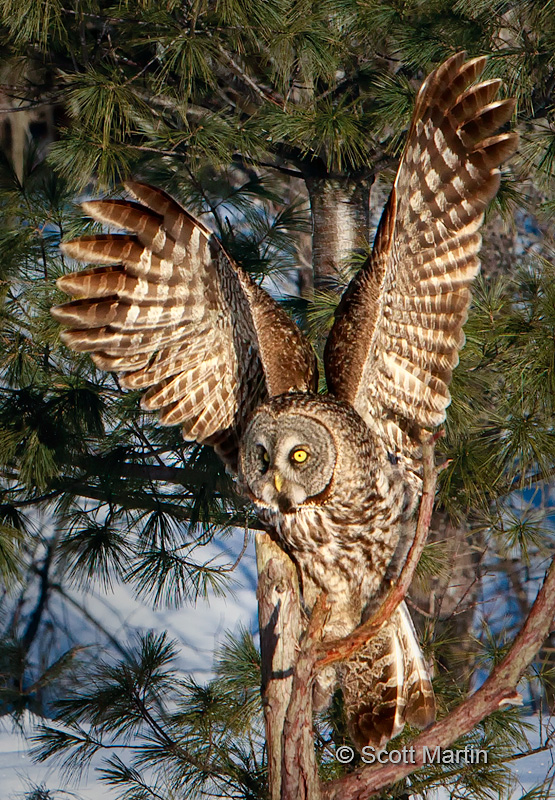
In order to become a better photographer, one has to become their own best, or worst, critic as well as being open to critique from others. It’s the only way we can learn to improve our skills, not only in terms of camera settings and technique but how to think about what a shot is going to look like even before you take it. Although taking pictures of wild birds and animals is difficult and quite spontaneous, you can always make sure you position yourself so the lighting is optimized and many of the elements in the frame (i.e., perch and back ground) are such that they enhance, as oppose to detract from, the resulting image. So lets critique the above image (feel free to leave a comment if you wish); for me technically the face is too soft (a nice way of saying out of focus) and compositionally the perch obstructs and casts a shadow on the owl and the back ground is too close to the bird causing the birds to be ‘lost’ in the back ground. Otherwise, I like the wing position and it’s always a treat to be so close to a Great Gray Owl.
Regarding technique, the soft face was simply because I missed focusing on the eye. The depth of field for this image was about 2m, unfortunately that 2m started just behind the owls face! In order to minimize the compositional challenges in this shot, I reduced the saturation of the back ground about thirty percent using Viveza 2, a NIK Software plug-in for Photoshop as well as using Color Efex Pro 4 to adjust the contrast and colour of the owl. Finally a vignette was added to darken the back ground (using a solid color layer in Photoshop). These were done to try to get some separation between the bird and its background. Another option would have been to blur the back ground, however I chose not to do so as it would have produced an un-natural ‘Photoshopped’ look. Sounds ironic, but virtually all digital images are processed (often heavily) yet the goal is to have a Photoshopped image that doesn’t look Photoshopped!
This next image is included simply for our discussion on critique and as an example of a common occurrence in wildlife photography……what could have been a ‘keeper’ but is ruined by an uncontrolled factor, in this case the owl flew into a deep shadow.
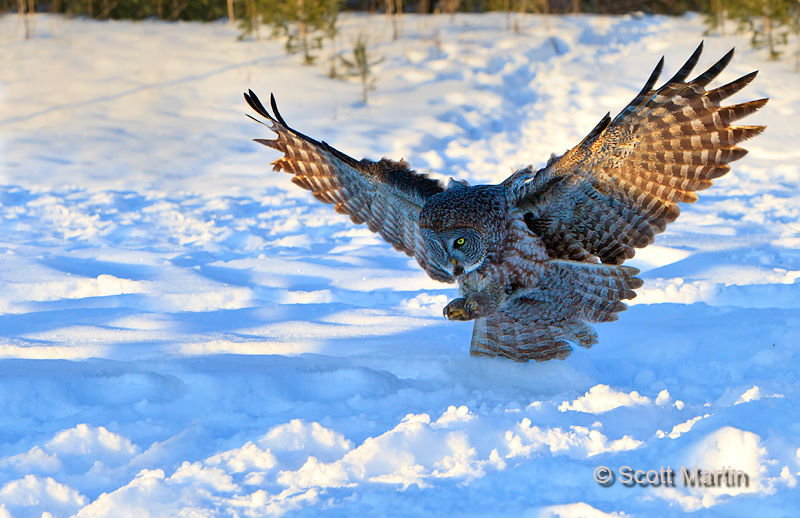
A lot of time was spent in post processing trying to get some detail out of the shadows and add enough contrast, colour and saturation to make the image ‘acceptable’ however it still doesn’t quite work as a great image. In this image the canvas was increased significantly, the back ground cleaned up a dark gradient added to the top half of the frame. We need to learn that its important to take great measures to get the shot right in the camera because no amount of time and skill in post processing can turn an average image into a good one. Photoshop doesn’t rescue anything from the recycle bin, yet we often spend way too much valuable time trying!
This last shot is simply out of the camera with no processing other than cropping and an automated Photoshop action preparing it for posting on the web.
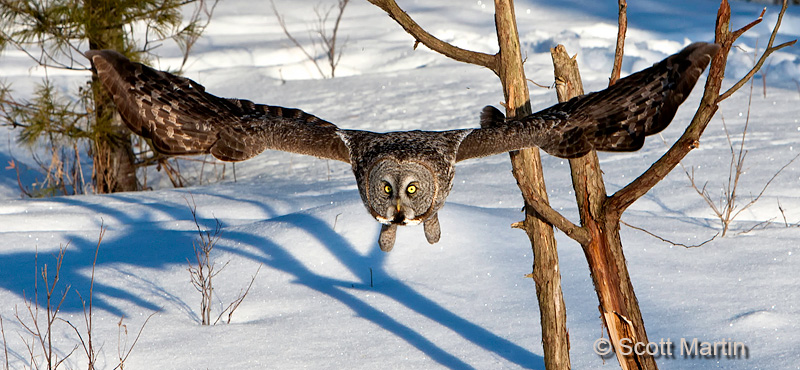
It’s a really busy back ground and won’t end up in a frame anywhere but it does capture the majestic wingspan of a Great Gray Owl and for some reason, purely subjective, I just like it….and that’s the beauty of photography….always strive to get better in every detail, whether it be technical or compositional, but in the end all that really matters is that you simply enjoy the picture!
The three images above were all taken with a Canon 1D Mk III and EF 70-200 f/2.8 L IS lens in -17°C temperatures!
by Scott Martin Photography | Jan 23, 2013 | Blog, Cityscapes, Educational, Landscapes, Travel
After flying all night from Toronto and arriving in Rome early in the morning, we checked into La Piccola Maison (a perfect place to stay in the heart of the city within walking distance of everything) and then headed for the Colosseum where we spent the rest of the day. Our path to the Colosseum took us right by the Trevi Fountain where we stopped and had our first gelato!
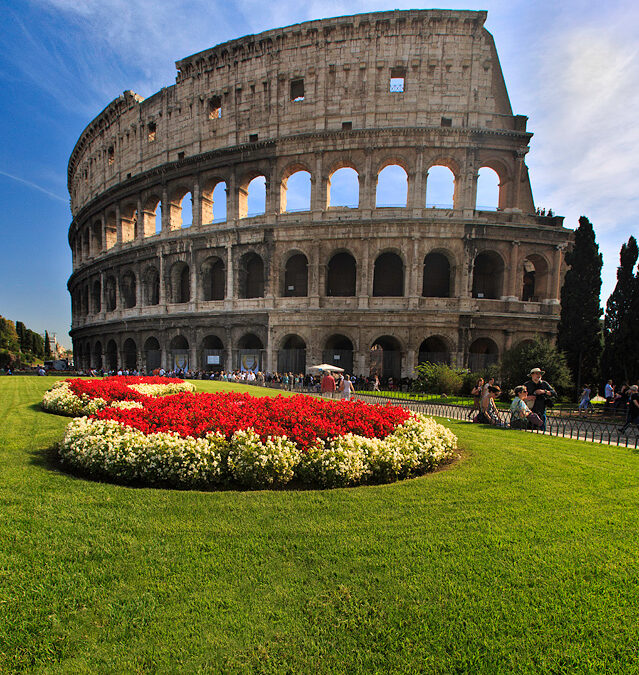
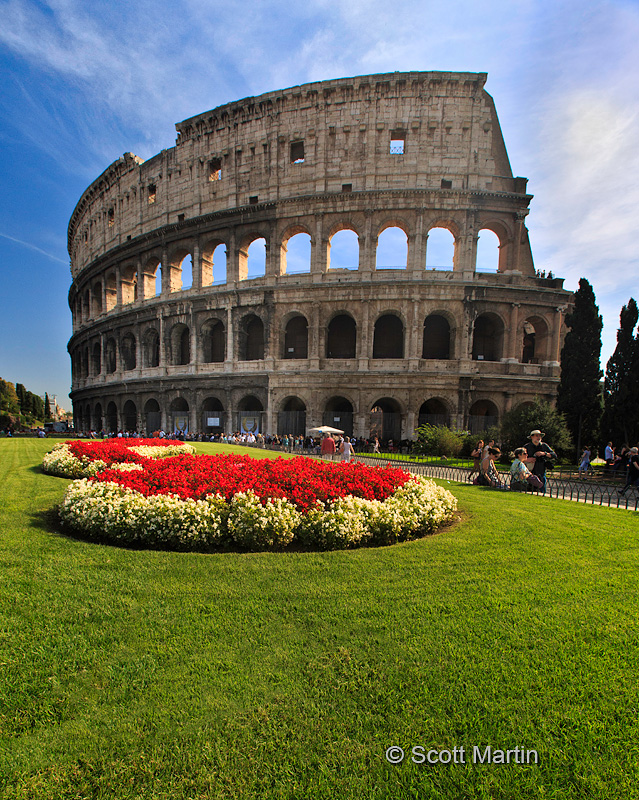
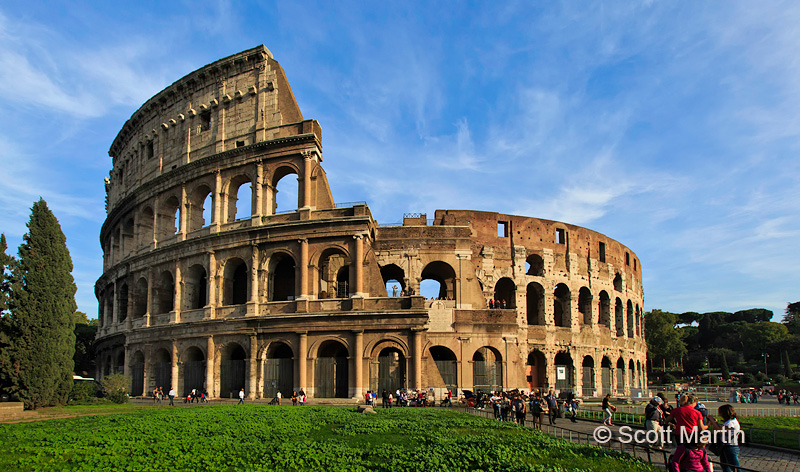
It was quite the feeling to be walking along the Via Dei Fori Imperiali and see the Colosseum coming into view for the first time, certainly the oldest structure we’d ever seen, having begun construction in 72 AD and completed under Titus in 80 AD. Here are our first views of the Colosseum.
.
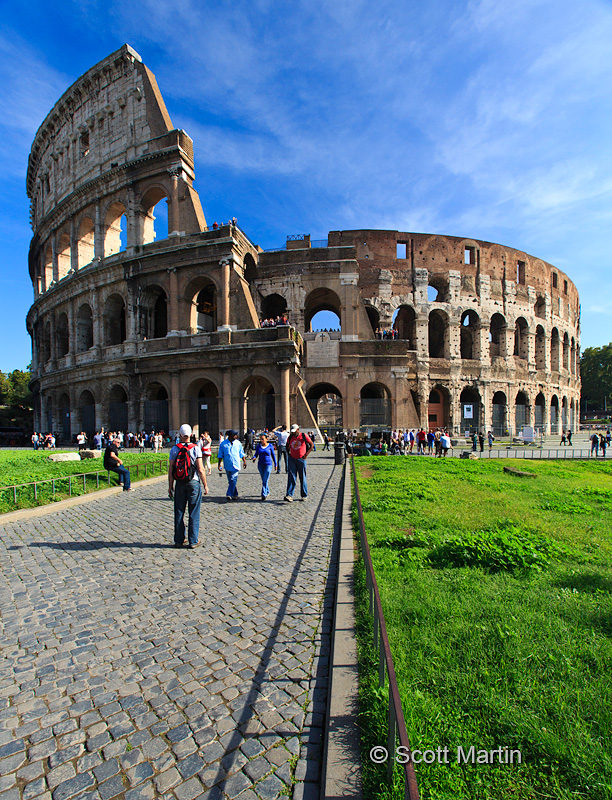
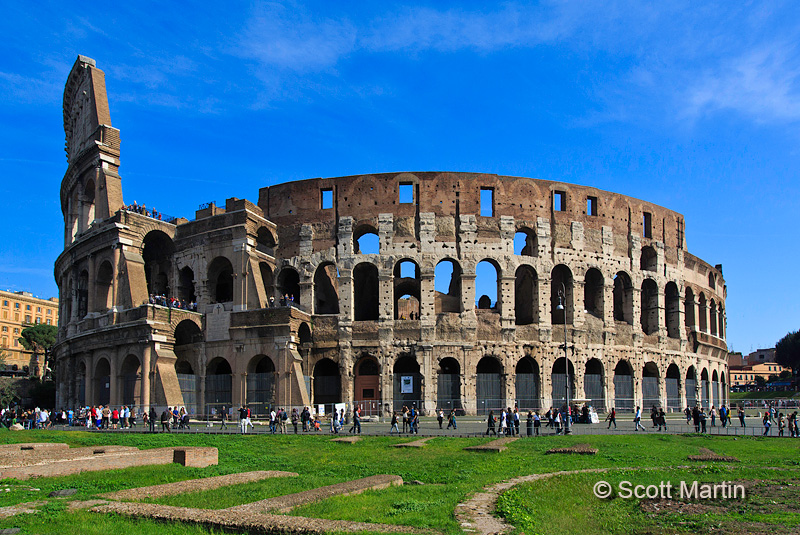
The Colosseum is a huge oval amphitheatre capable of seating 50,000 spectators. It is 615′ long, 510′ wide and stands 157′ tall, having a base that occupies more than six acres. The outer walls were made of travertine stone and no mortar was used in the construction. The stonework was held together with bronze clamps, most of which have been pried and torn out for other uses. This has resulted in the pock marks that remain today as seen below.
The interior floor of the Colosseum measures 287 x 180′. The floor was a wooden floor covered by up to a foot of sand. Our tour guide relayed the morbid information that the sand was required to absorb the blood shed in Colosseum events, both of wild animals and humans. It is recorded that 9,000 wild beasts were killed in the inaugural event in 80AD. Below the wooden Colosseum floor is the two-story area known as the hypogeum, which is shown next. The East end of the floor has been re-created, leaving most of the hypogeum visible.
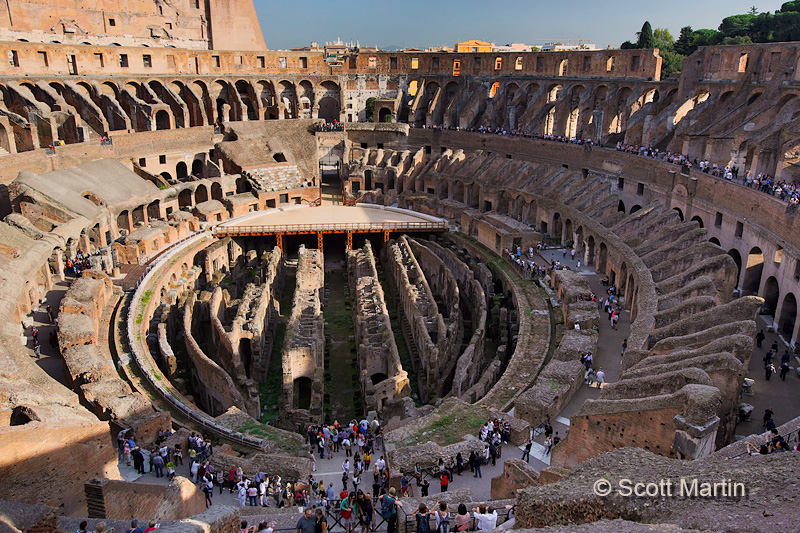
.
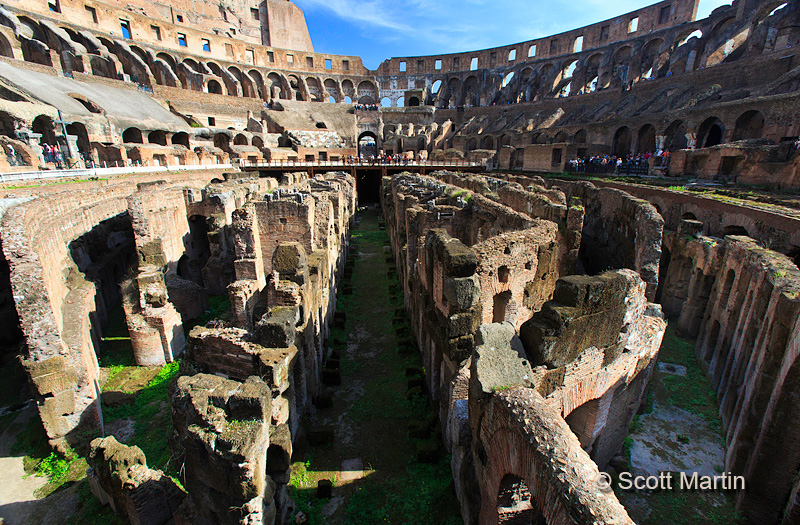
Until last year access to the hypogeum was not possible, however by purchasing special tickets you are now able to join a guided tour of the hypogeum as well as go up to the third level of the Colosseum, neither of which are possible with the general admission ticket. Although it more than doubled the cost of visiting the Colosseum it was an amazing experience to go down below the floor level into the hypogeum. Unfortunately the images you will see can not come even remotely close to portraying the feeling you get while standing there walking along the same pathways that countless Christians walked as they headed to the elevators used to push them up onto the arena floor where they were killed for sporting spectacle before 50,000 people.
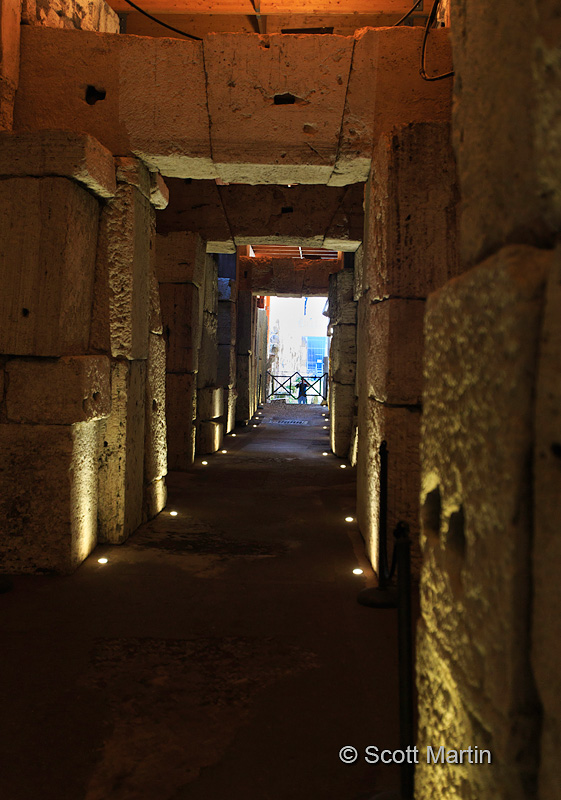
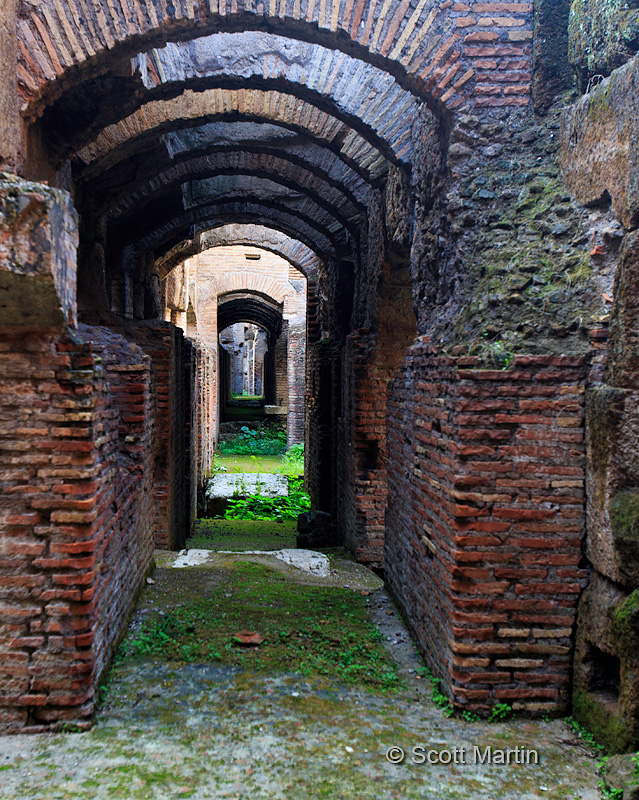
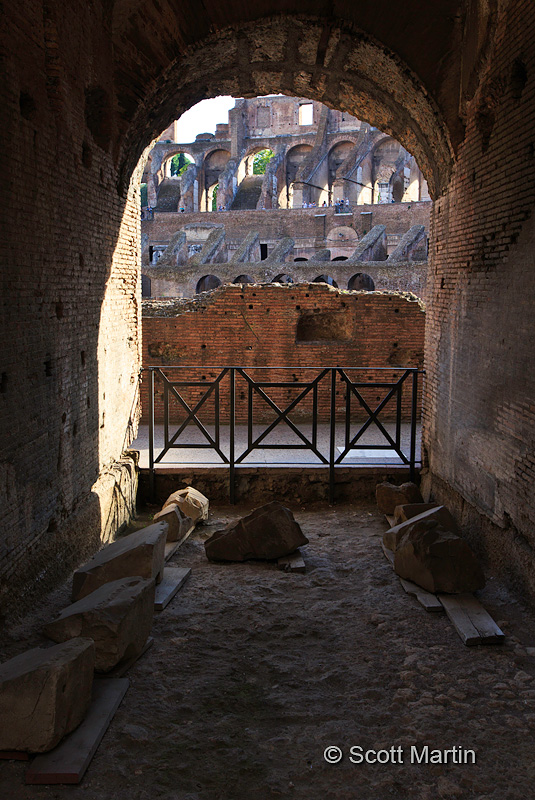
(Aside: A couple of things to note regarding the above photograph, the first being the lack of mortar and the use of keystones in the arches of the walkway to provide the necessary structural integrity. Secondly this shot was taken as an ‘in-camera’ three shot HDR, meaning that with one press of the shutter, the camera takes three images, one at the metered exposure, one (in this case) three stops underexposed and another three stops overexposed. The camera then combines the three images into one new image and deletes the three originals. This HDR (High Dynamic Range) technique has been in use for years however the processing was always done on the computer using Photoshop and taking a lot of time. With today’s new cameras it can be done in a few seconds right in the camera.)
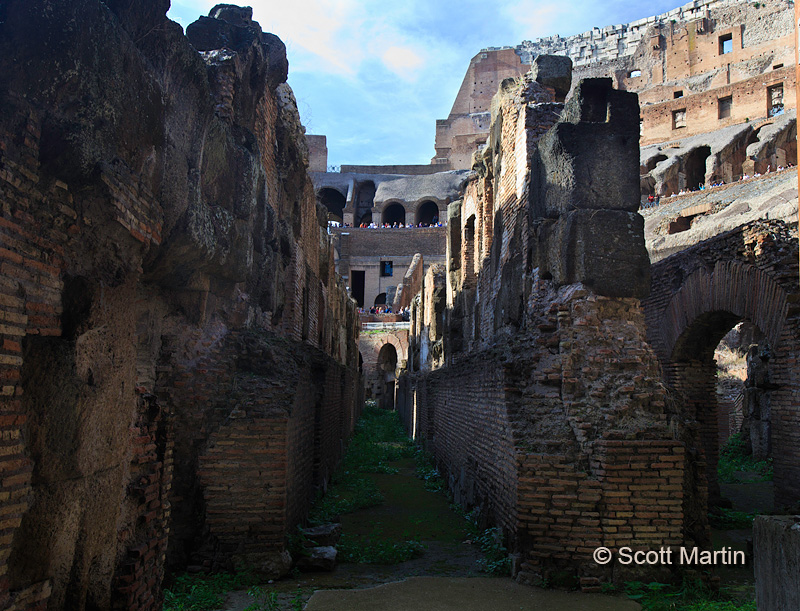
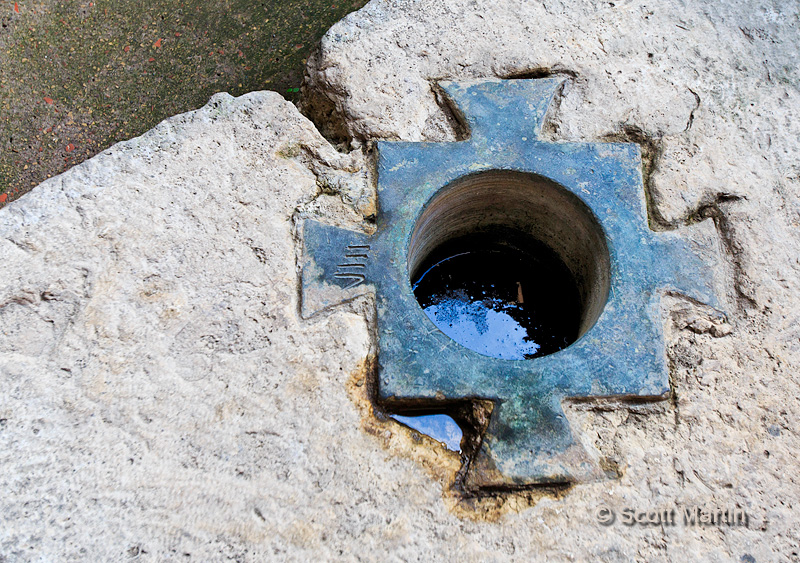
The next image shows the outer wall of the hypogeum and along the pathway you can see travertine slabs which are bases for a complex elevator system that was used to move wild animals, people, and large stage props, from the hypogeum up onto the arena floor. It is thought that the elevators were moved by rope and pulley systems that were manned and operated by slaves who either lived in the hypogeum or were brought in through tunnels to work the elevators.
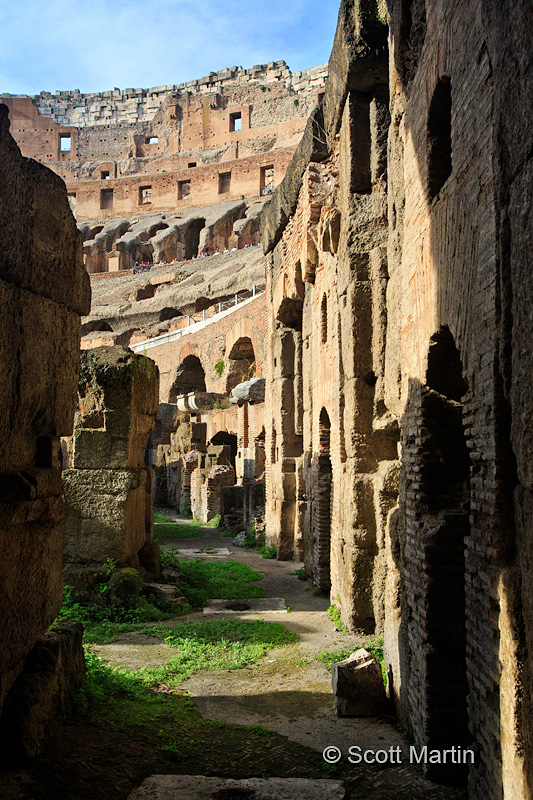
A close up of an elevator shaft support, this one is #8 of eighty found in the Colosseum.
It’s hard to believe this walkway is almost two thousand years old.
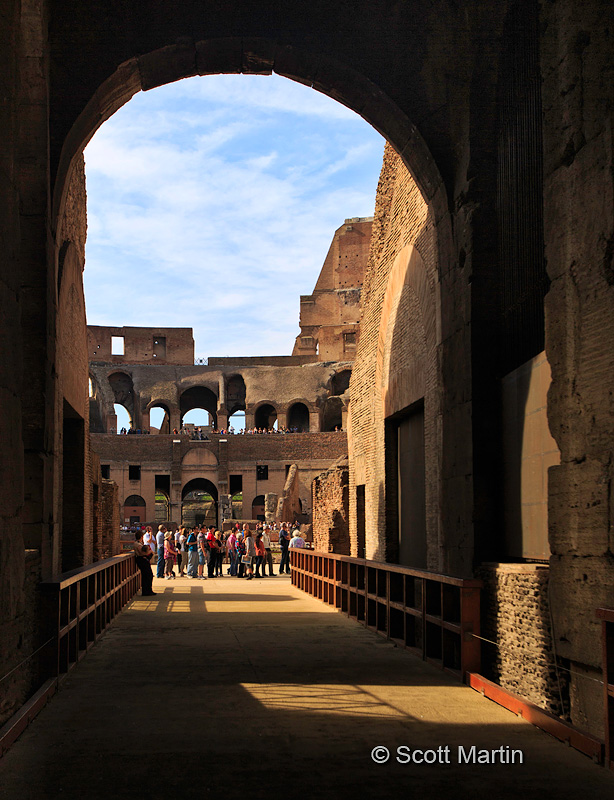
The Colosseum was known for its ability to quickly get spectators into and out of the building, in fact there are eighty arches leading into the amphitheatre, seventy-six for regular people and four large arches for the elite. Below is the East arch, through which the Senators entered and headed to their private seating area, which is shown in the second image below. Each white marble slab is the base for a senator’s chair and many of these slabs have the various senator’s names engraved on them. You can also see the senator’s seating area and the East arch in the fourth and fifth images in this blog post.
.
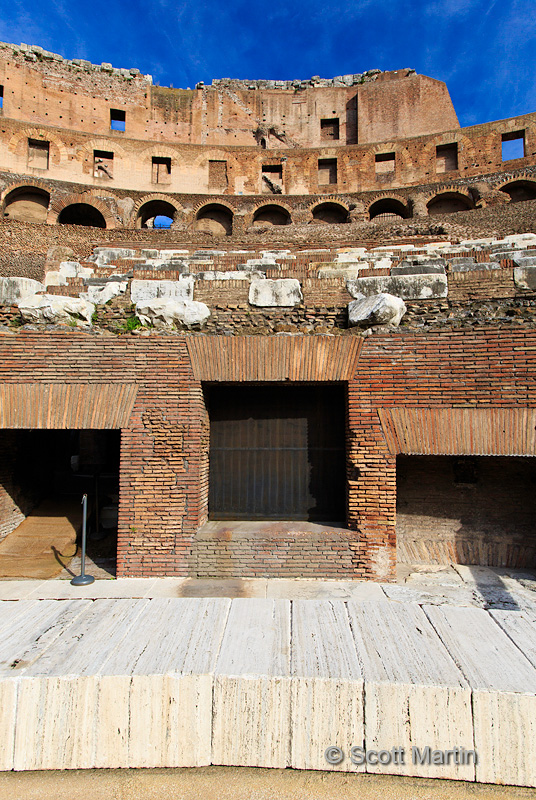
Here is one of the much smaller 76 entrance arches used by the commoners.
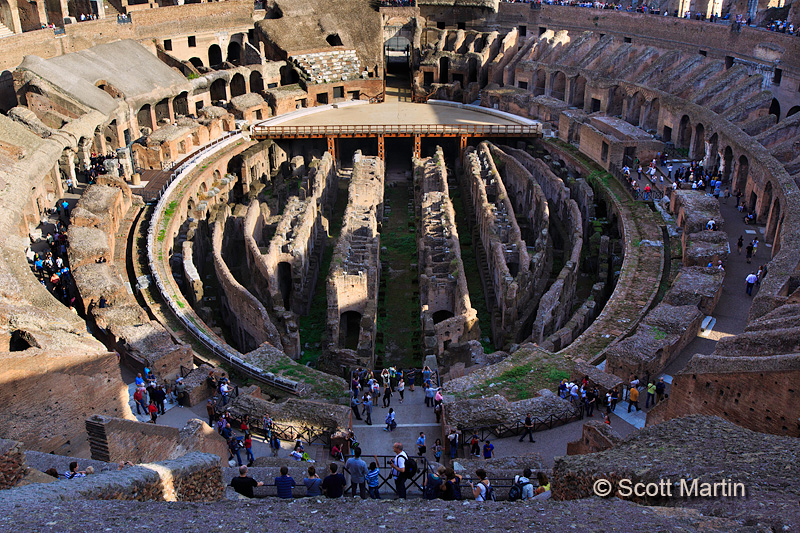
The climb to the third level of the Colosseum provided a wonderful birds eye view of the amphitheatre.
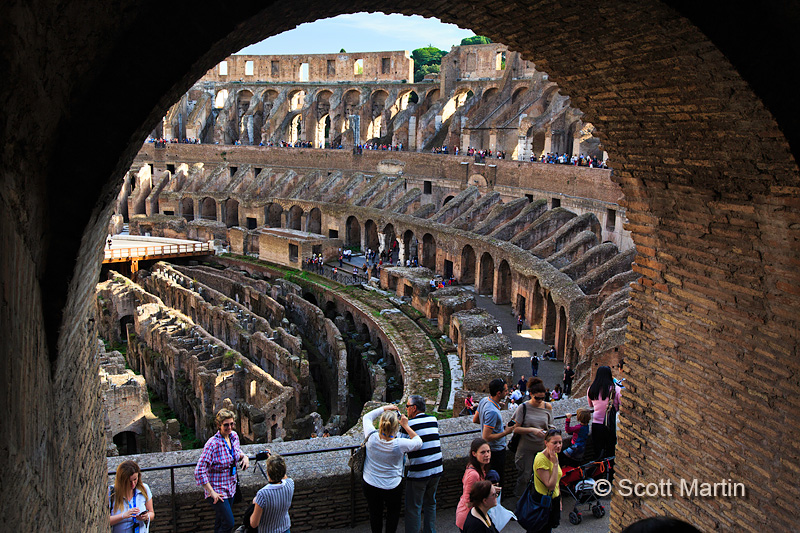
Another view from the stairwell between the second and third levels.
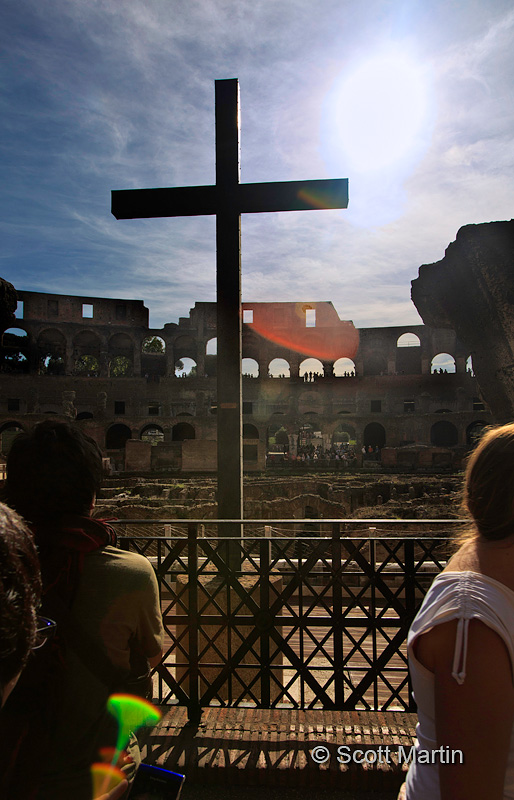
The last gladiatorial fights were circa 435 and the last recorded animal hunts around 523. By the end of the sixth century a church was incorporated into the Colosseum and a cross erected for the first time. Since then the Colosseum has been used in many different ways and certainly makes for interesting reading if you are so inclined.
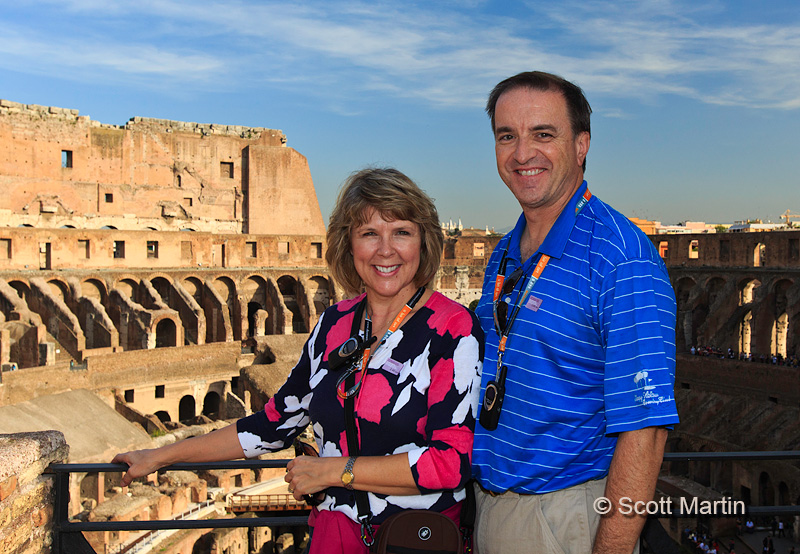
Our first day in Rome was terrific and spending a few hours in the Colosseum was an experience like none other. We even took time to pose like the tourists we were!
One final shot of the Colosseum.
All of the images taken in this post were with the Canon 5D Mk III and either 16-35 or 24-105mm lenses. Larger size versions of the images in this post can be seen in the Rome gallery.
Thanks for taking time to look through these images of the Roman Colosseum and as always your comments are much appreciated.
by Scott Martin Photography | Jan 3, 2013 | Blog, Cityscapes, Educational, Landscapes, Travel
Last fall Deb and I celebrated our thirtieth wedding anniversary touring though as much of Europe as we could possibly cover in seventeen days. It was a fabulous trip that saw us accumulate over 4,500 km on our rental car and see so many fabulous sights that had it not been for photographing as much of it as possible we surely couldn’t remember everything! Over the upcoming weeks we will try to post some of the highlights of our trip on the blog and will also post the images in the travel section of the website gallery.
We began our trip in Rome and spent our first afternoon in Italy touring the Colosseum, which was a truly amazing experience. The emotions you feel as you are guided through the hypogeum (underground levels of the Colosseum) are indescribable as you recall in a way that is not possible by reading a book, or studying in school, the events that occurred in the very place you are standing some two thousand years ago.
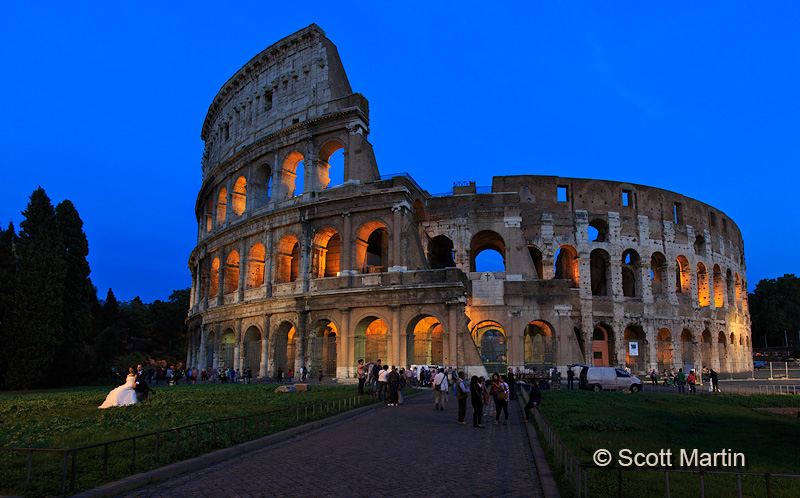
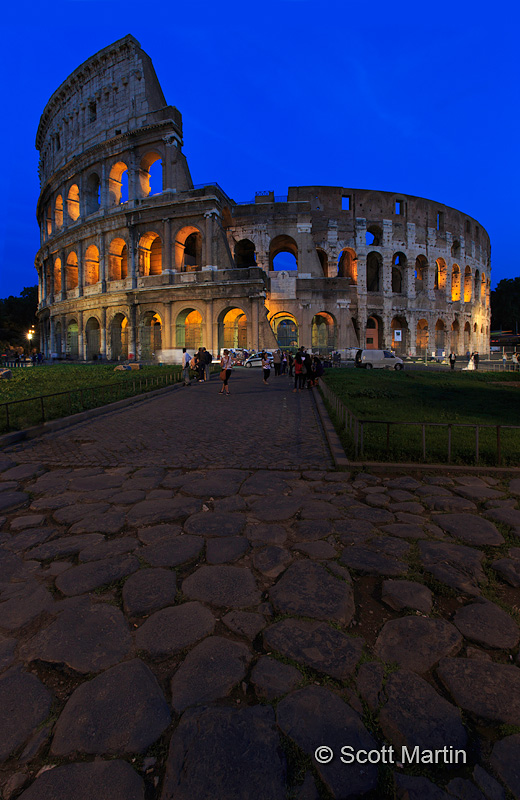
The next blog post will include more of an informative photographic description of the Colosseum and its history however for now I would like to post a few images of the Colosseum taken at night. They are posted in chronological order so you can see the sky darkening in each image.
Night photography is a lot of fun and as long as you have the correct equipment and know a little of the technical fundamentals it’s not very hard to get some interesting pictures. The most important piece of gear for night photography is a good tripod. It is impossible to hand hold a camera in the low light of the evening and get a good sharp image as the exposures required are just too long. From a technical perspective you may find the following helpful; try to take night shots while there is still blue in the sky as once the sky is black all detail is lost and the edges of the subject are lost in the darkness; use a low ISO (200 or less) to help reduce the noise in the image which is always more noticeable in the dark colours that dominate night photography; use a small aperture (f/22) for great depth of field so everything remains in sharp focus throughout the image. A small aperture also creates the starburst effect on light sources that many people enjoy seeing.
It is impossible to shoot the Colosseum without people milling about however you try your best to wait until there are no people in the foreground. In this case having a bride and groom in the picture adds to the appeal of the image.

Most night images are taken in landscape orientation however experiment with a vertical perspective as well, especially if you can incorporate something of interest in the foreground. In this case the large cobblestones which have probably been there for almost two thousand years….you cant help but wonder who has walked on those very stones.
.
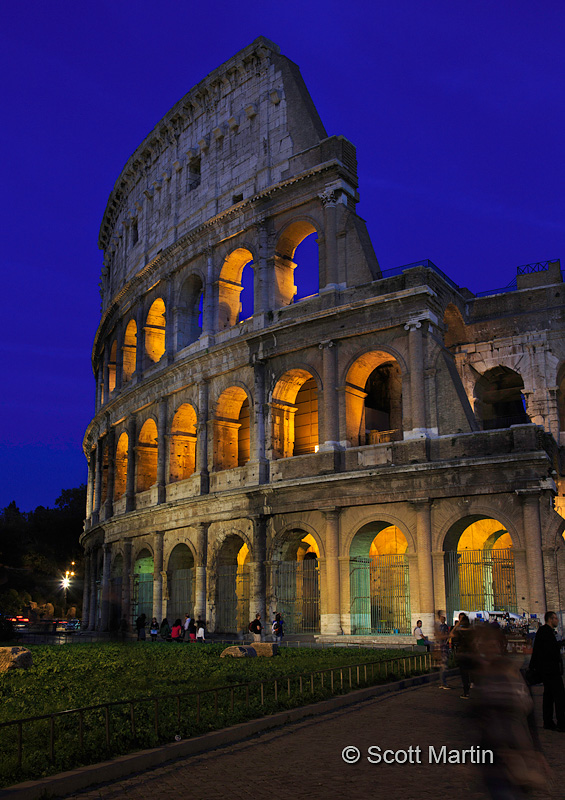
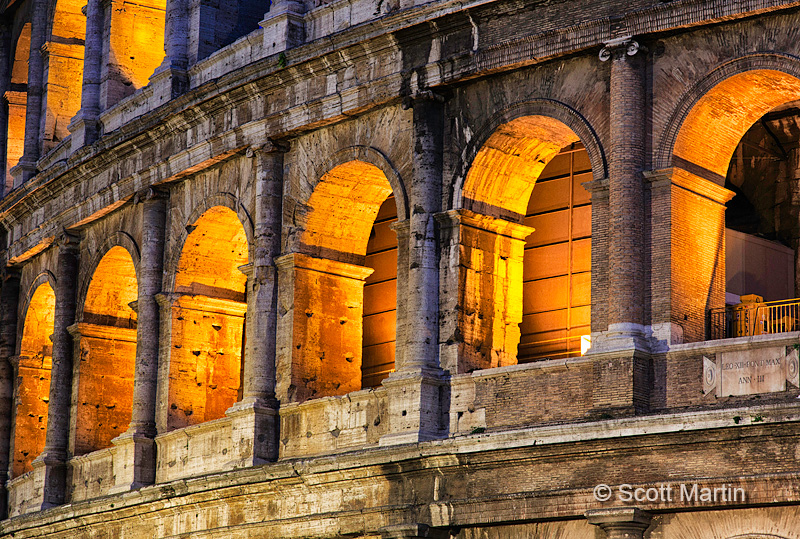
The next image is not in keeping with the others however is a reminder that it’s always good to experiment with different perspectives of the same subject when taking shots at night, even if it means changing lenses to zero in on a specific area that interests you. The next image has also been processed differently in an attempt to portray the age of the building.
.
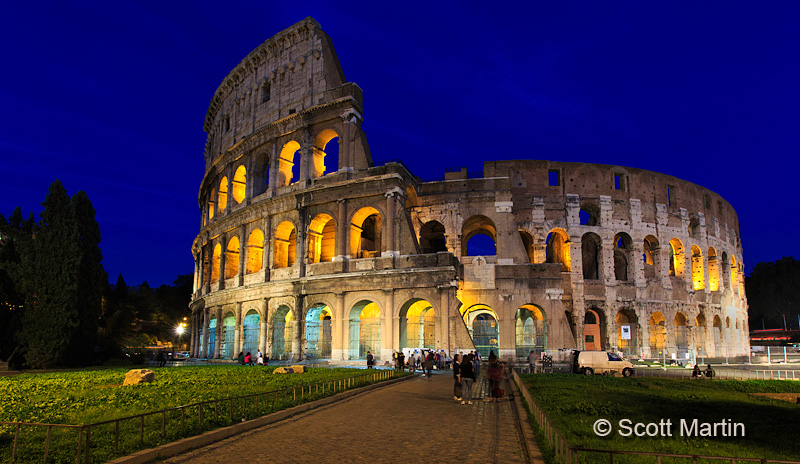
The next image was also designed to include the couple on the left and although they are very blurry because of the twenty-second exposure, they do add to the image.
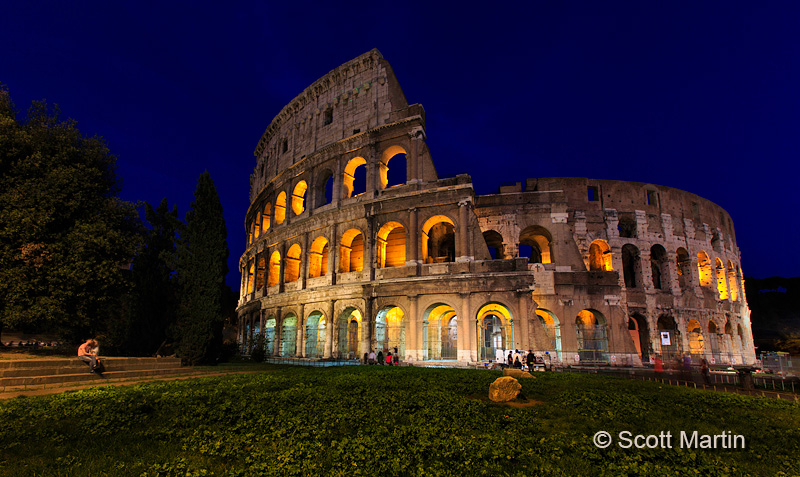
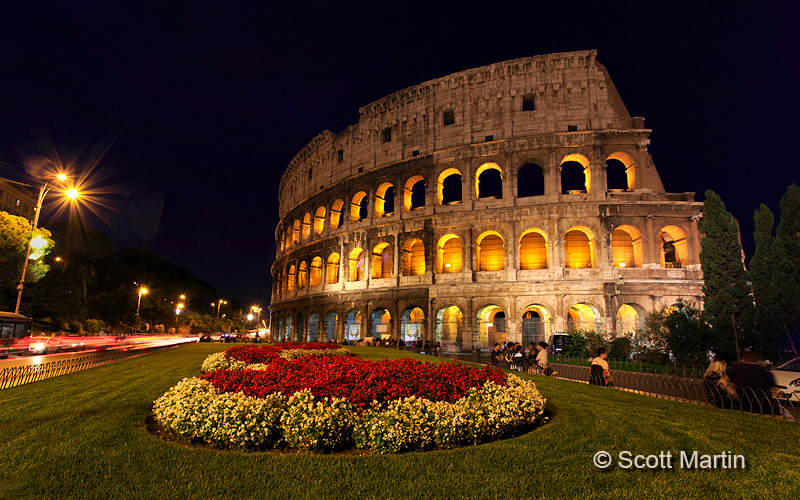
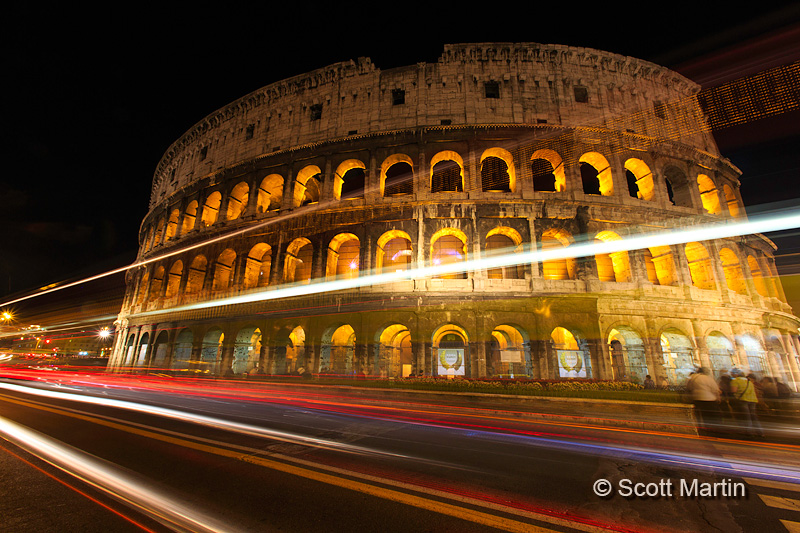
By now the sky is almost devoid of blue so its time to pack up or in this case move to another location and shoot images that don’t rely on the background to be effective. When the sky becomes black make sure you always have a foreground object that provides plenty of interest compositionally; the flower bed in the next image and the streaming lights from the traffic in the last.
.
All of the images in this post were taken using a Canon 5D Mk III on a Gitzo 1542T tripod using a 16-35mm or 24-105mm lens. If you have any questions regarding the taking of these images please leave a comment and I’ll be glad to respond. In the mean time, dust off that old tripod and start practicing night photography and I know you will be pleased withy the results.
by Scott Martin Photography | Dec 31, 2012 | Birds, Blog, Educational, Song Birds
Once again it is hard to believe that another year has quickly slipped by and we are heading into 2013 in just a few hours. Its been an exciting and busy year for our family yet we are looking forward to what awaits us next year. It has been an unusually long time since our last blog entry but hopefully as I get caught up with all the image processing that seems to clog up the Photoshop ‘in-basket’ the posts will become more frequent in the New Year.
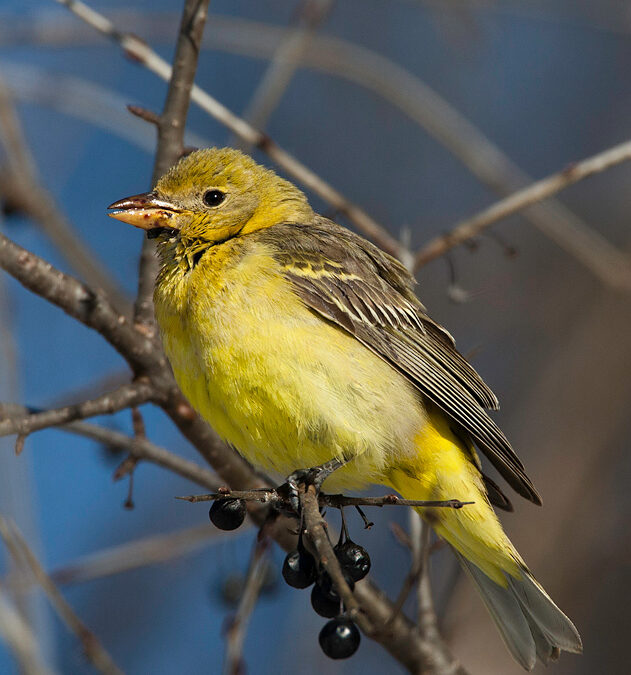
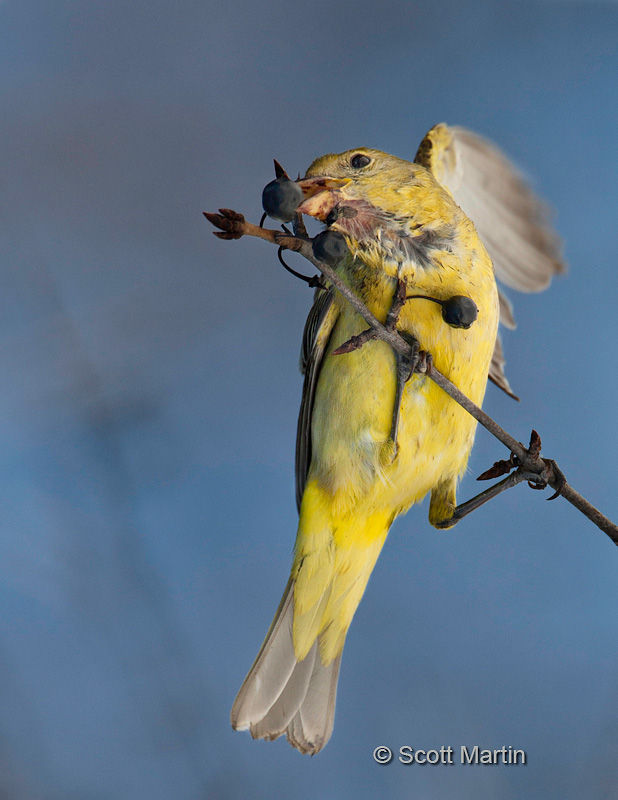
For the last couple of weeks our city has been home for a bird that is very rare in this part of North America, the Western Tanager. Yesterday I was able to catch some shots of her in good light on relatively clean perches; both of which are great joys for a bird photographer!
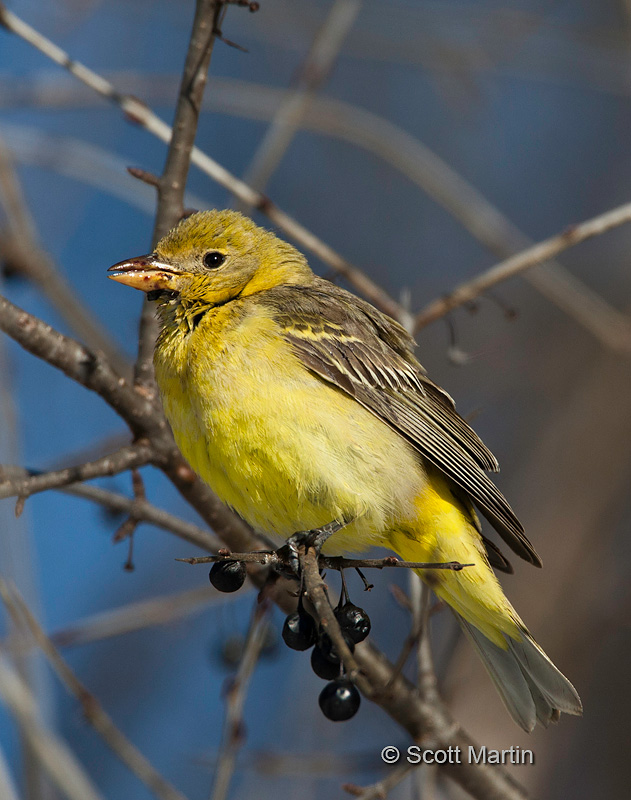
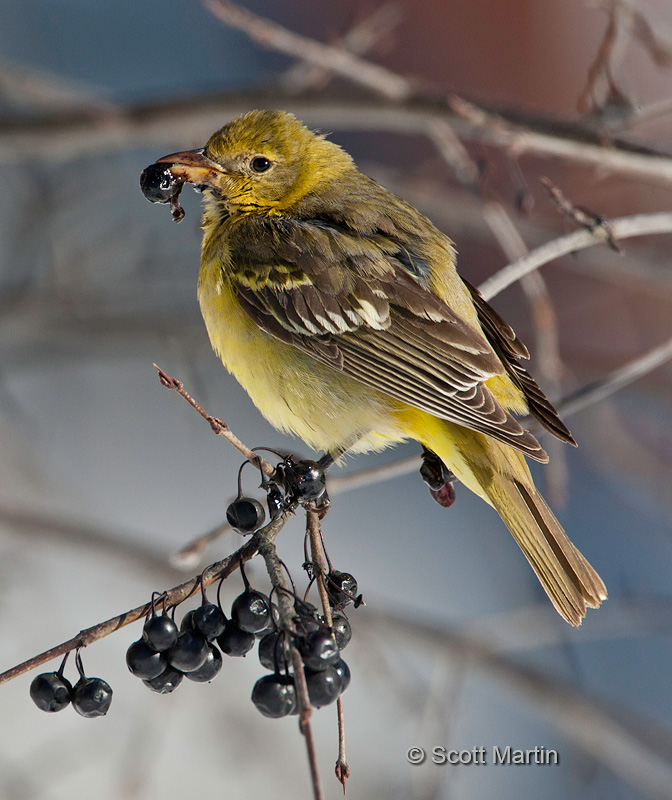
The Western Tanager is a fairly small bird generally about six inches long and weighing an ounce! They live on the North American west coast and migrating to South America for the winter. They are rarely seen east of the mid western States so when one shows up in Ontario it creates a lot of interest in the birding community with many people travelling hours to catch a glimpse. Fortunately this bird is less than five minutes from our house. Western Tanagers have bright yellow bodies with darker backs and their wings have two wing bars, an upper yellow bar and lower white bar which you can see on the image above. The male has a bright red head while the female’s is an olive-green colour. The following image also shows the distinctive wing bars.
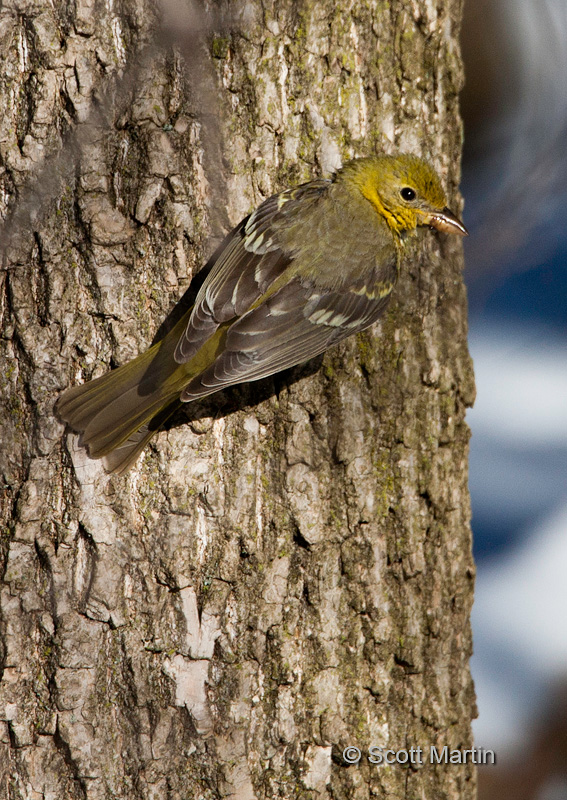
The Western Tanager typically feeds on berries and small insects, which it forages for on tree bark (as above) or, like swallows can catch in mid-flight. Given the cold weather & snow it is surprising this bird is staying around, however there are lots of berries in the area she is staying and given the fact she is thoroughly lost and on her own, she may not know which way to head so will choose to winter here as long as food is plentiful.
.
.
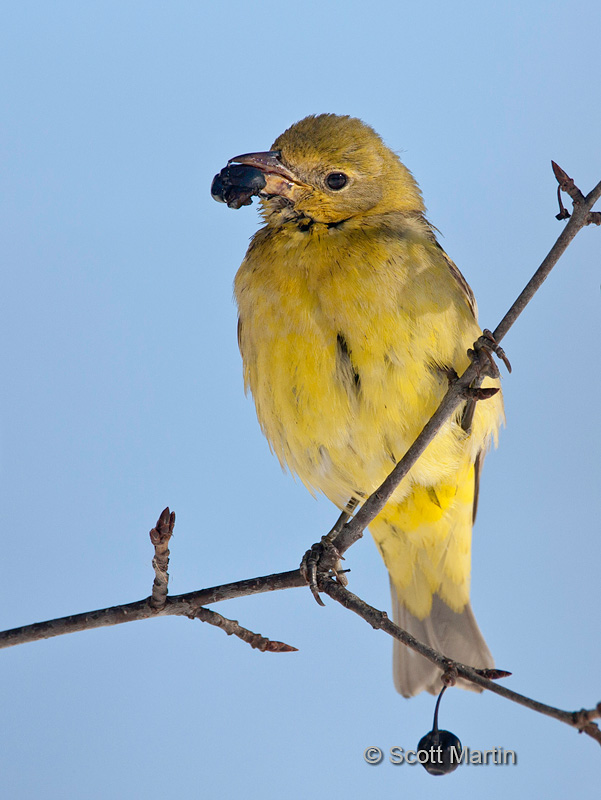
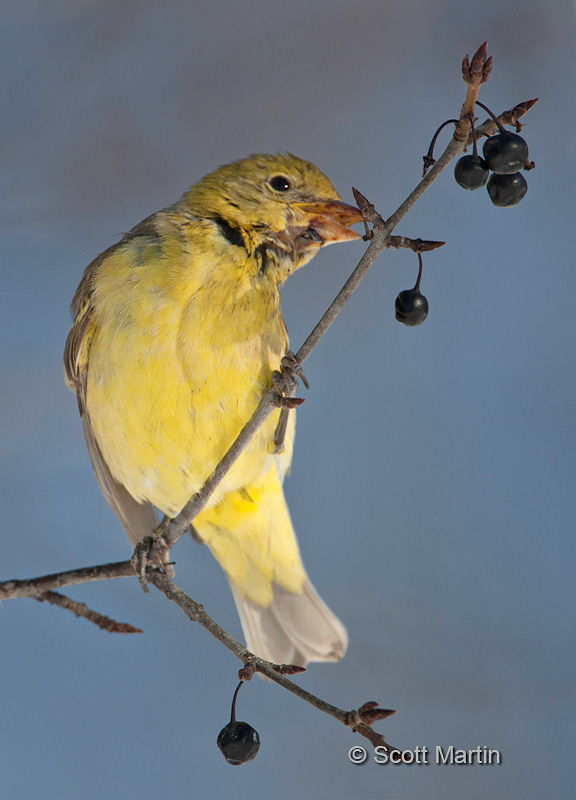
From a photography point of view, back grounds are almost as important as the subject in terms of getting the best photographic results. A nice perch and uncluttered back ground is generally the goal however almost impossible with the smaller songbirds which are usually foraging in bushes low to the ground. This Western Tanager was very cooperative and gave some good poses against a clear sky. Its imperative that you get the right exposure on the bird when shooting them against the sky and that typically means over exposing what your camera meter indicates by one or two f-stops.
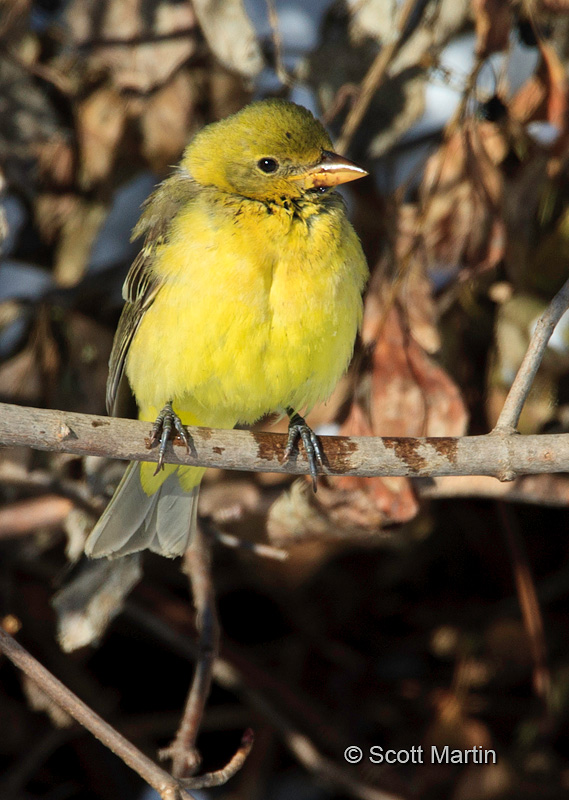
The last two images have busy back grounds however show the bird in a more natural environment doing what she does as much as she can, relaxing in the sun in a location sheltered from the wind and then enjoying another berry.
.
All of the images above were taken with a Canon 1D MKIII and 500 mm lens + 1.4x TC mounted on a Jobu monopod with a Jobu Jr. gimbal head.
Thank you to all my many friends who have taken time this past year to drop by and check out the website. Thanks also for your comments and questions which are always appreciated. To everyone, Deb & I wish a very Happy New Year and I look forward to hearing from all of you in 2013.
UPDATE January 3, 2013 – I’m sad to report that this bird was found dead yesterday in the park it had called home for the past couple of weeks. Not certain of the cause however it may have succumbed to the cold weather.
by Scott Martin Photography | May 8, 2012 | Birds, Blog, Educational, Sparrows, Warblers
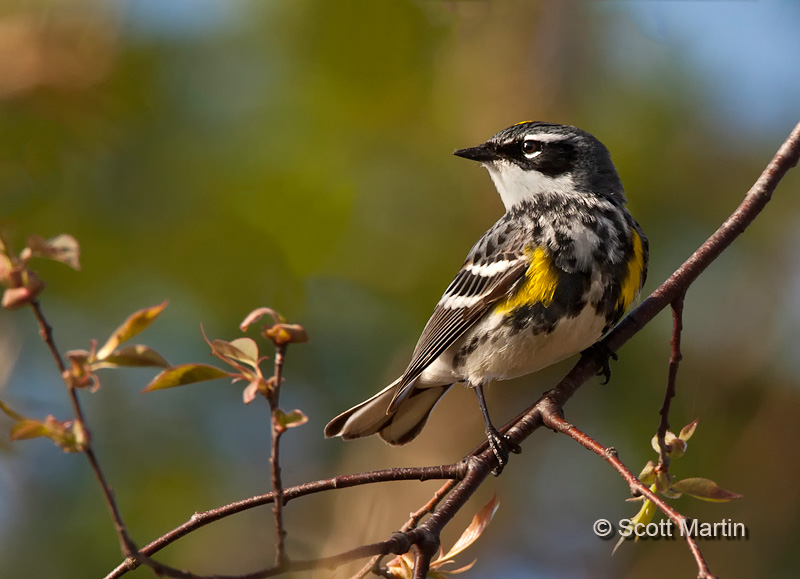
Although I haven’t had much time to get out with a camera, its great to see the Spring migrants starting to show up in large numbers, especially the Warblers. More than twenty species have been seen in our area and fortunately the leaf cover is still sparse enough that you can catch a good look at most of them. That will all change in the next few days as the leaves and ground cover reach full bloom.
We spent last weekend at the cottage, getting it ready for another summer and it was a pleasant surprise to have a number of Yellow Rumped Warblers in the trees by our deck. Although one of the most common warblers, they certainly are pretty, especially when they pose for you!

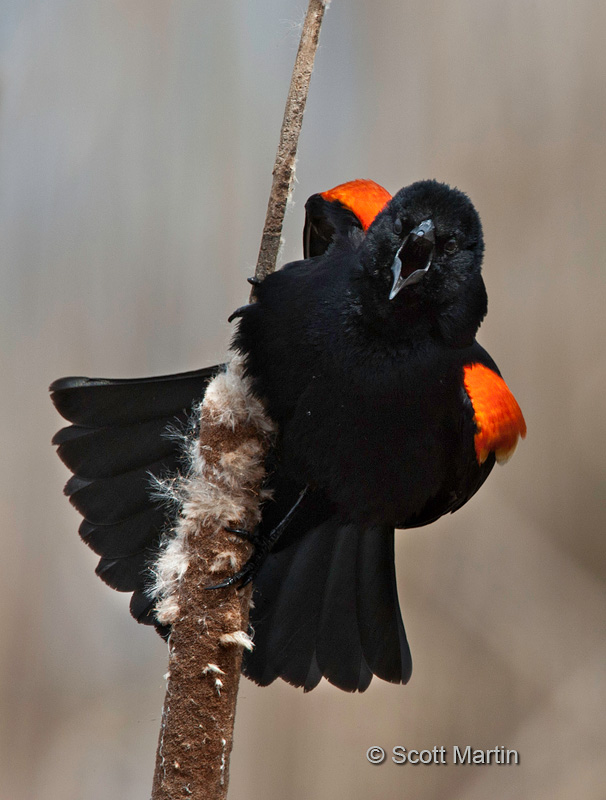
This next shot of a Red Winged Blackbird that didn’t want his picture taken is from Cranberry Marsh which is just off Lake Ontario in the south end of the Lynde Shores Conservation area in Ajax, Ontario.
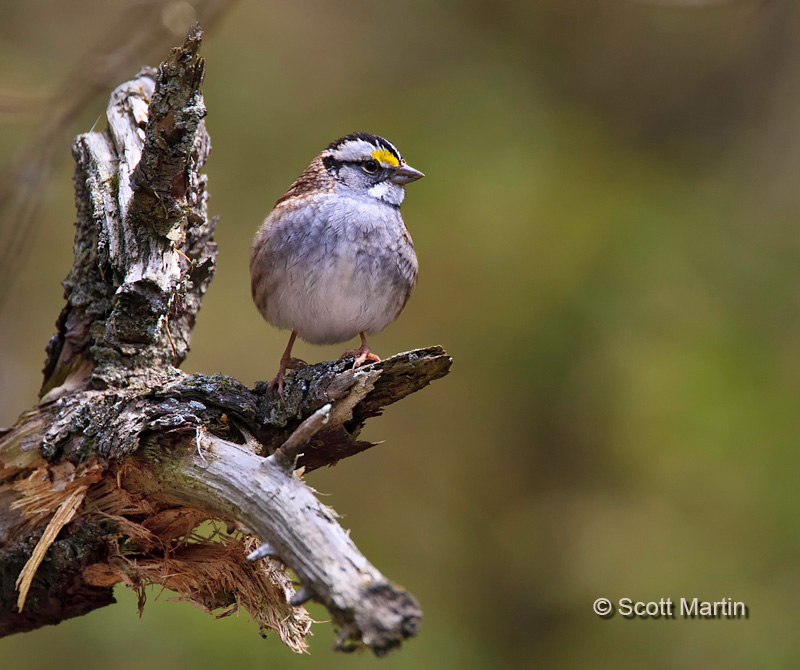
Two photographers whose blog I follow are Darwin Wiggett and Samantha Chrysanthou and one of their recent blog postings talked a lot about using different crops to enhance images, including the square crop. This White Throated Sparrow shot provided a good opportunity to practice with a square crop.
This image was taken in Thickson’s Woods in Oshawa and the Sparrow landed on a very interesting perch, nicely separated from the back ground. The problem is the perch overwhelms the small bird, which is normally a ‘no-no’ for good bird images. Typically you can minimize the large perch by cropping the photo to minimize the visual impact of the perch, resulting in this typical landscape oriented crop.

After reading Darwin’s blog on square crops, and quite liking this large perch, I decided to re-do the little sparrow on the big perch in a square format.
It is always a good practice to think outside the box and break down some of the traditions we photographers cling to, especially when it comes to composition and all the other ‘un-written’ rules of photography.
by Scott Martin Photography | Apr 27, 2012 | Birds, Blog, Educational, Sparrows, Woodpeckers
Canon is clearly the global leader in DSLR sales, with $10.5B in sales in 2010 compared to second place Nikon with $2.5B in sales. Sony places a distant third in the pecking order. A number of months ago Canon announced the release of two new camera bodies, the 1Dx and the 5D Mk III, Both of these bodies have full frame sensors, meaning that the size of the electronic sensor is the same as the frame size of the old 35mm SLR film cameras (36x24mm). The vast majority of DSLR’s sold today have smaller sensors, which results in the sensor ‘seeing’ a smaller field of view than would be seen with a 35mm film camera having a lens of equal focal length. The quantification of this phenomenon, called the Crop Factor, is made by determining the ratio between the diagonal length of the reference sensor size and the diagonal length of the smaller sensor. With crop body DSLR’s the crop factor is typically 1.3 or 1.6 for Canon cameras and 1.5 for Nikon cameras. The crop factor allows the photographer to calculate the effective focal length of a lens on a crop body camera compared to that same lens on a full frame camera. For example if a 50mm lens is attached to a DSLR with a 1.5 Crop Factor, the 50mm lens will perform as a 50 x 1.5 or 75mm lens would on a film body.
You may be saying to yourself “Who cares”, however it does make a difference based on the type of photography you do. For example landscape photographers often want to capture as large a field of view as possible and therefore use wide-angle lenses (shorter focal length lenses) to accomplish this. Right away it becomes evident that crop body cameras are a detriment if the widest possible field of view is desired. A 16mm lens effectively becomes a 25.6mm lens on a 1.6 crop body. This is why nature photographers prefer full frame DSLR’s for landscape work. The bird photographer on the other hand finds that the crop body is a great help to getting better shots because of the advantage gained by the crop factor. My 700mm lens effectively becomes an 1120mm lens on a 1.6 crop body.
The problem with photography becomes what to do when buying a camera if you are both a landscape and a bird photographer. There is an easy answer to this question…..buy two cameras, a crop body and a full frame body! Besides, if you are a serious photographer, you really should have some redundancy in you gear. If your only body broke while shooting a wedding it would be a disaster, so a second body is always a good idea.
Anyway, in order to heed my own advice, a Canon 5D Mk III was added to the gear bag a couple of weeks ago and so far its been a pleasure to use and fun to be playing with the first full frame camera since selling my old EOS 630 back in the early nineties. The new 5D Mk III has a 22.4 megapixel sensor and Canon’s new 61 point auto focussing system which is surprisingly fast. It’s ISO range of 50-102,400 is amazing and means this camera almost sees in the dark! Another new perk for me is that the 5D also shoots full HD video which is going to be fun.
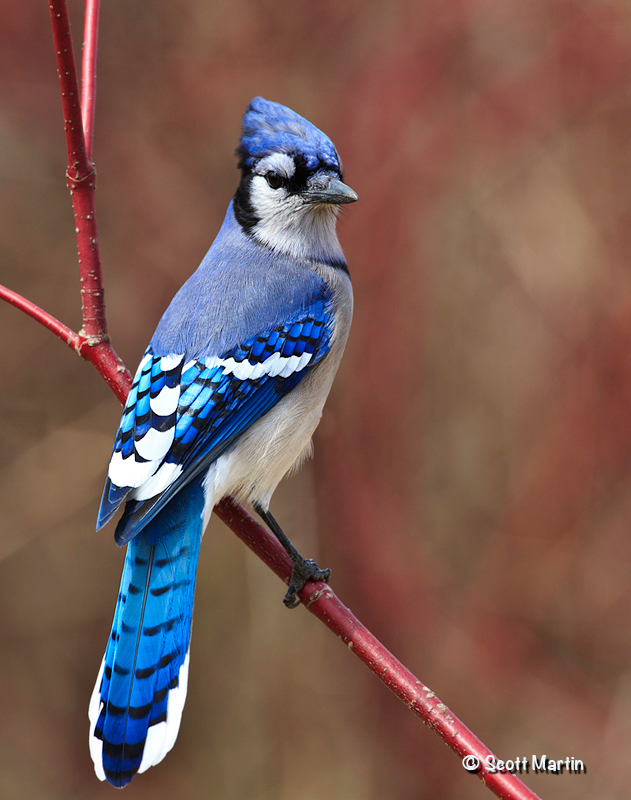
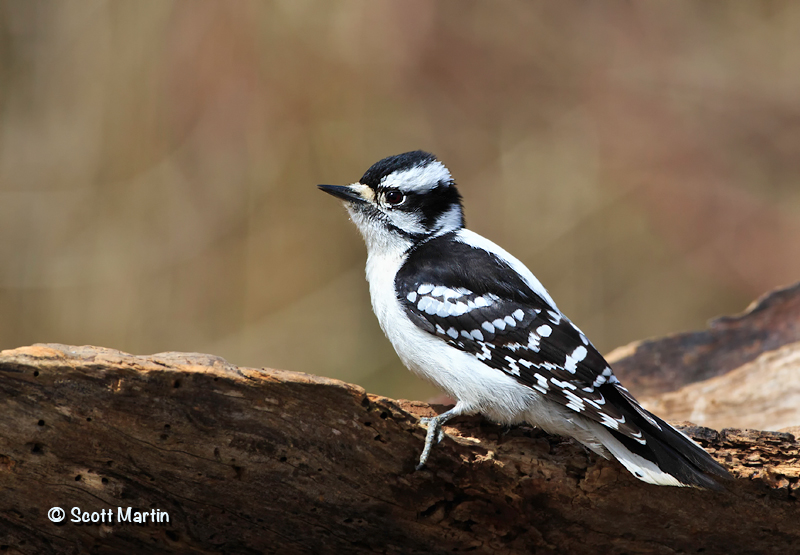
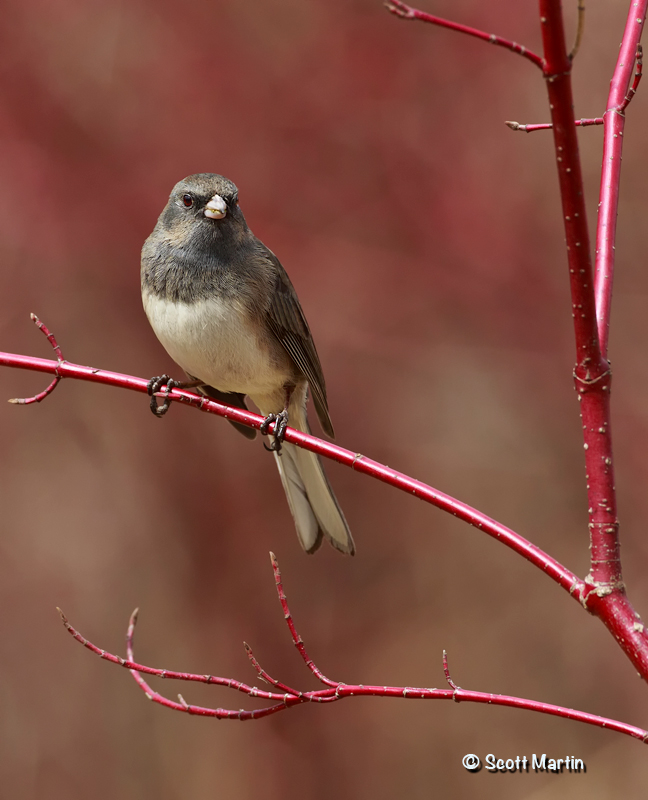
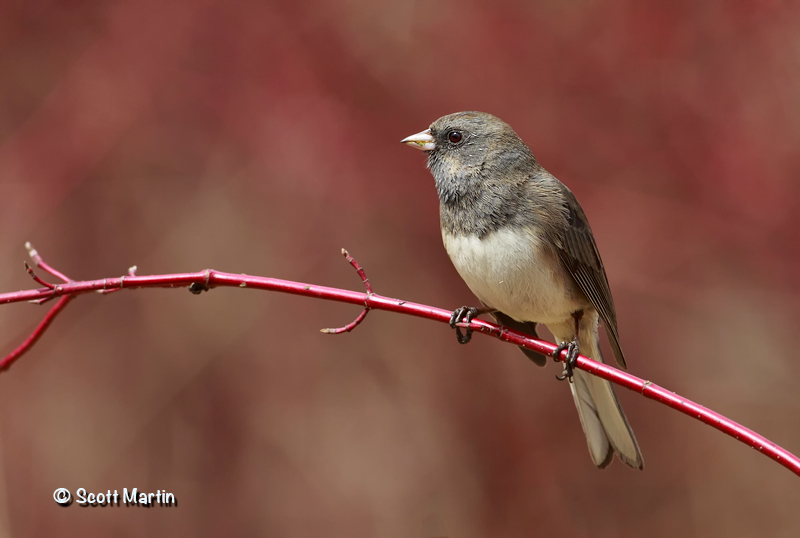
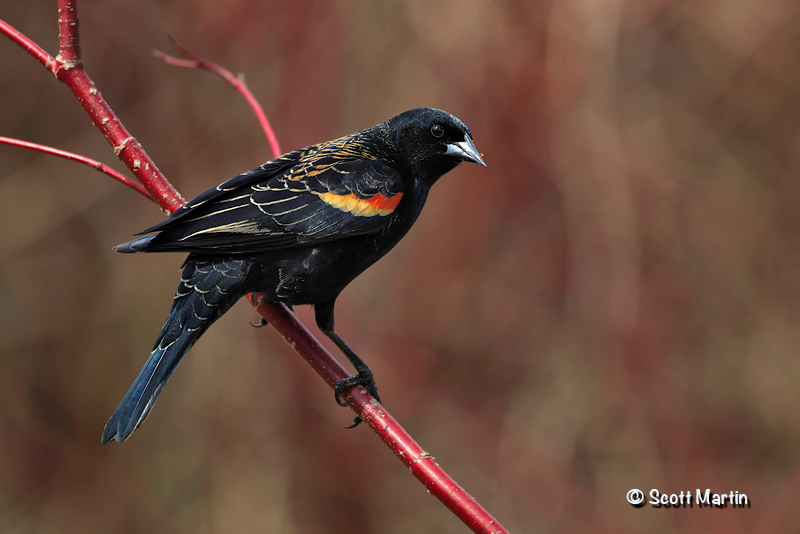
The following images are among the first taken with the camera and have not been processed other than converting and resizing the RAW files for display on the web.
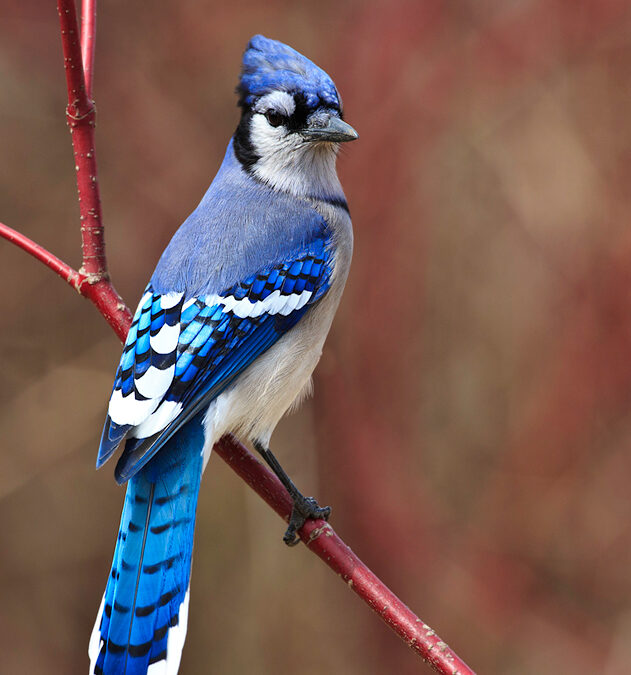
Blue Jay
Downy Woodpecker
Junco
.
Red Winged Blackbird
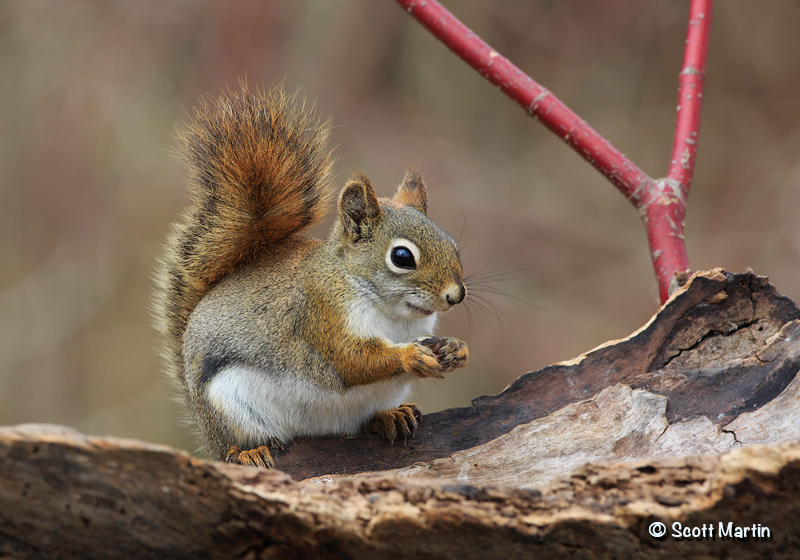
Red Squirrel
And finally a link to a quick video test of a Red Squirrel
As time permits I plan to post a few more detailed tests of the camera, especially ISO comparisons to help determine how high the ISO can be pushed and still get a useable image.


Follow Scott Martin Photography